Simple, Sweet, and Satisfying. Could there be a better way to describe our latest watermelon-themed summer project? (We think not!)
Creating this watermelon bracelet is a fun and easy way to fill those in-between moments—whether it’s a lazy weekend, a break between camps, or a spur-of-the-moment creative session. Bonus: it keeps little minds active and focused while giving them that oh-so-satisfying feeling of completing a project!
And while you’re crafting, throw in a few of these fun watermelon facts for some juicy trivia:
Watermelons are considered both a fruit and a vegetable! (They contain seeds and are in the gourd family.)
They’re made up of 92% water—hydration, anyone?
There are over 1,200 varieties of watermelon!
Watermelons are packed with lycopene, an antioxidant that may help reduce cancer risk.
Oklahoma’s state vegetable is—you guessed it—watermelon. Yes, it sparked an actual legal debate.
Japan grows watermelons in molds to create different shapes, though they’re more decorative than edible.
The world’s heaviest watermelon weighed in at over 350 lbs!
Seedless watermelons? They’re hybrids, not genetically modified.
Don’t worry—there’s no quiz. Just some quality time and a fruity-fun bracelet to show for it!
This project is perfect for kids ages 5 and up and makes a fabulous activity for a watermelon-themed birthday party.
#6 pony beads in green and red
Black fringe beads (for the “seeds”)
Bead cups
Clasp (toggle, lobster claw, or extension chain)
Beading wire (.014 diameter, 19 or 21 strands preferred)
Crimping pliers or chain nose pliers
Flush cutting pliers
Crimp beads
Bead stoppers (optional)
Measuring chart – click here for our free template!
Bead mat (optional – velvet is great for keeping beads in place!)
Step 1: Measure the beading wire around your child’s wrist and lay it on the measuring chart line that matches best.
Step 2: Cut the beading wire 3 inches longer than that line to allow extra room for the clasp and extension chain.
Pro tip: A clasp adds about 1 inch, and chunkier beads take up more space when the bracelet is closed—plan accordingly!
Step 3: Add a bead stopper to one end of your wire (or use tape if you don’t have one) to keep your beads from slipping off. We’ll leave both ends open for now and add the clasp at the very end so everything stays centered.
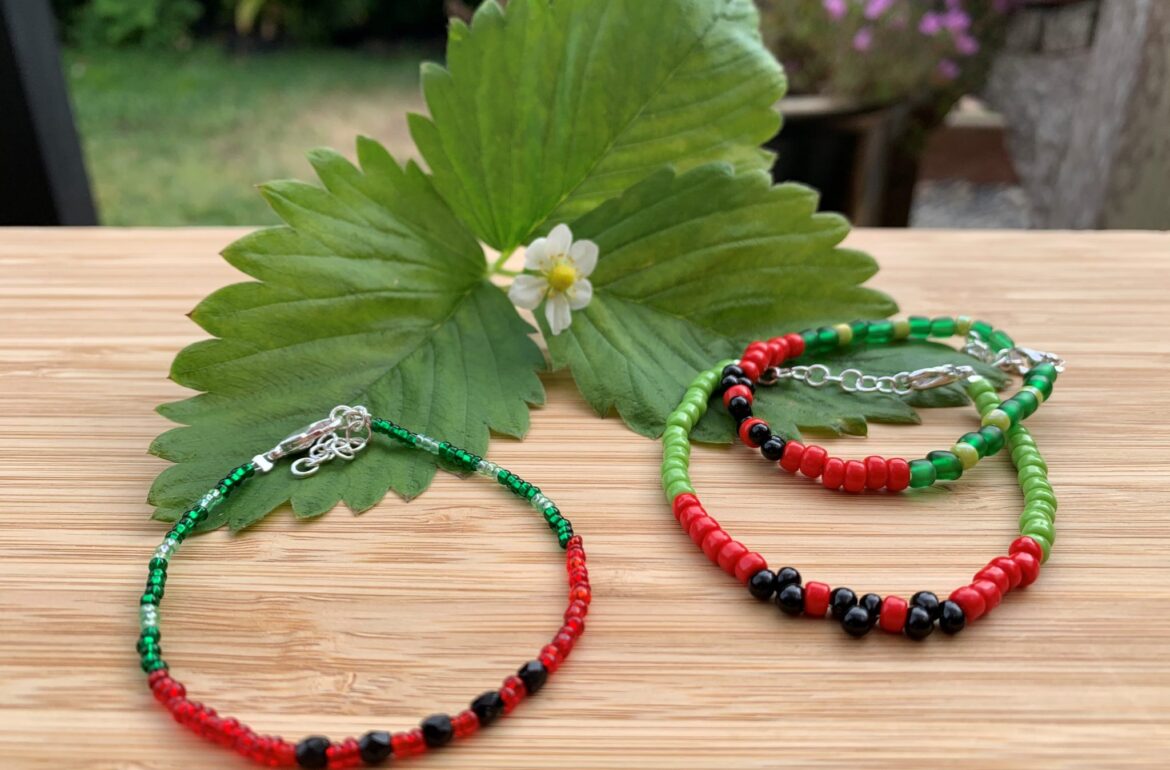
Step 4: Start by sliding on three black fringe beads—this is the center of your bracelet. Then add one red pony bead on each side of those fringe beads.
Step 5: On both sides of the wire, add another set of three black fringe beads, followed by six red pony beads.
Step 6: Double-check that the bracelet is centered (red and black beads in the middle), then begin stringing on the green pony beads on both sides.
Step 7: Keep measuring as you go! Make sure the green beads are evenly spaced so your center design stays front and center.
Step 8: Once the bracelet matches the wrist measurement and looks even, do a final fit check on the wrist.
Step 9: Time to add the clasp! Slide on a crimp bead, add your clasp, then loop the beading wire back through the crimp bead. Use crimping pliers to secure.
Step 10: Repeat Step 9 on the other end to attach your extension chain.
That’s it—your juicy, gem-like watermelon bracelet is ready to wear or gift!
We’d love to see your sweet creations—share your bracelets and party fun with us on Instagram @hellodragonflyfun!
Need some Happy Mail? Join our mailing list to stay updated on the latest Dragonfly Designs news, latest offerings, and special promotions!
© 2025 Dragonfly Designs. All Rights Reserved | Proud to be a Woman-Owned Small Business
Join our mailing list today and also receive a FREE, beautifully illustrated coloring e-book. Time to unlease your creativity!