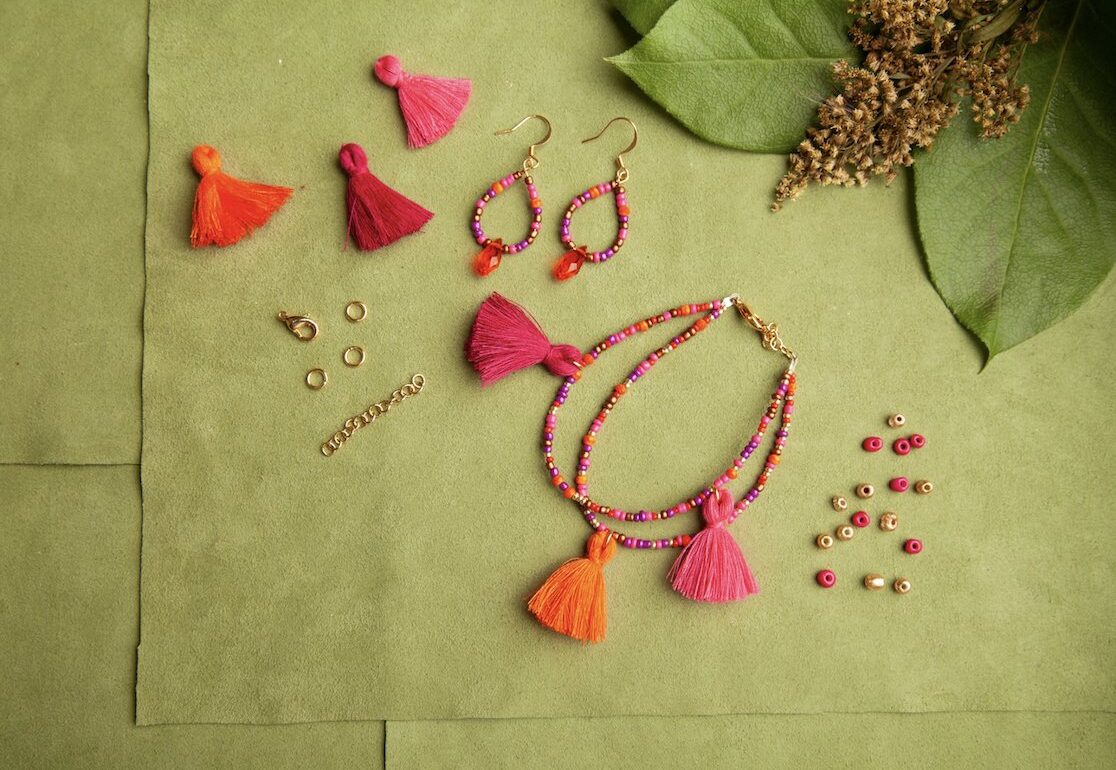
We believe that creative inspiration can be found just about anywhere…even in your own backyard! The motivation for this project, however, was discovered just a bit further away…on a trip I took with my daughter to Morocco. Impressed with the handcrafted wares by skilled, local artisans, we gleefully purchased a dazzling array of colorful tassels. And, while you may have been hoping for a souvenir like a t-shirt or a snow globe, we did you one better – the gift of tassel projects galore!
We’ve channeled our love affair for this trendy trimming with a series of DIY tassel jewelry projects starting with this eye-catching, Two-Strand Tassel Bracelet.
Step 1: Decide how long you want your bracelet to be – you can get a good feel for this by wrapping a piece of jewelry wire around your wrist, making sure that it fits comfortably. Cut a strand of flexible beading wire that is about 4” longer than the finished length of the piece you plan to create. You will need two pieces of beading wire of this length. The reason you want to cut the beading wire longer is to give yourself flexibility with the final length.
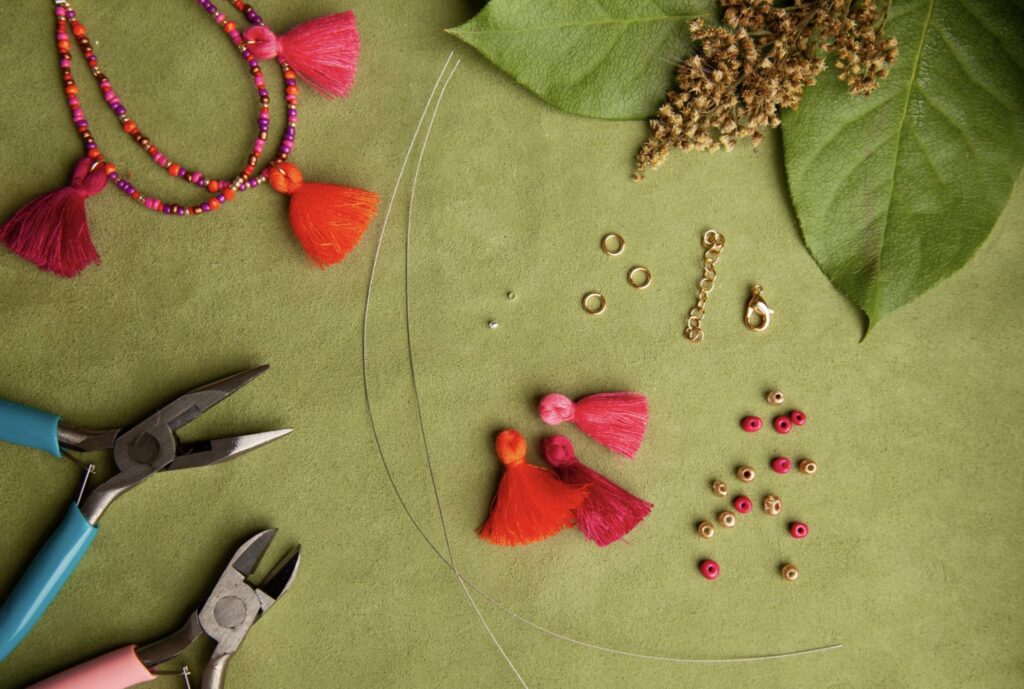
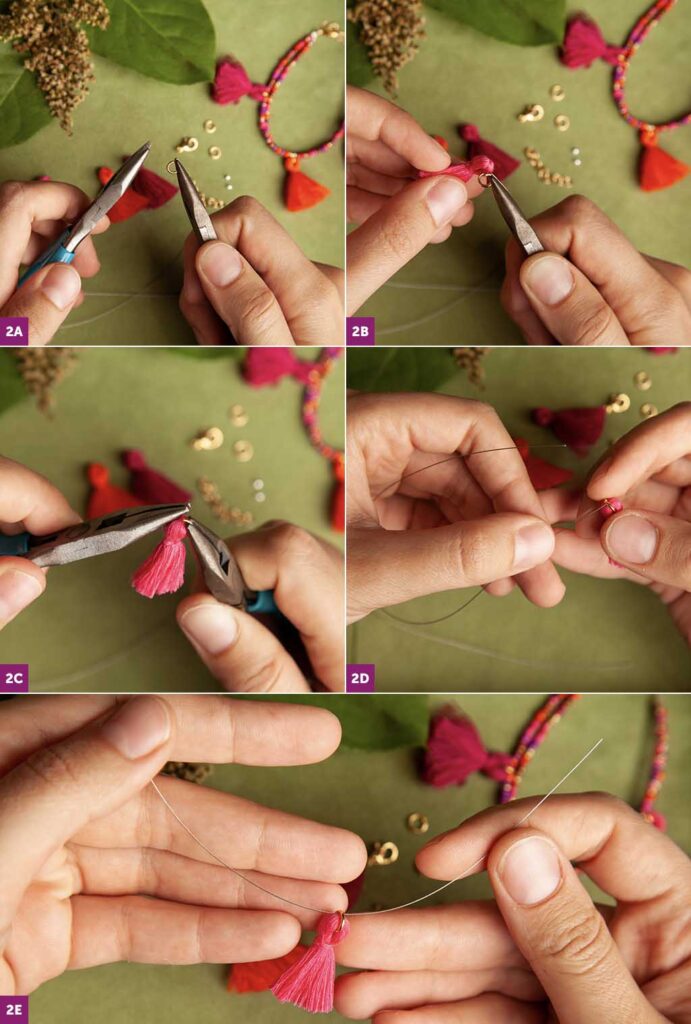
Step 2: First, you will create the first strand of your bracelet. In the final look you want the tassels to have a staggered design, so we will keep this in mind when adding the beads and tassels. For this first strand, you will start by placing a tassel in the middle of the beading wire. To give you more freedom to adjust your design as you go, we’ll start beading without attaching the clasps onto the beading wire first – so make sure you have some bead stoppers on hand to protect your work as you go!
Note: To have your tassels ready to put onto your bracelet, take one of your jump rings, twist it slightly to open, slide the tassel onto the now open jump ring, and twist it close. Then place onto your wire.
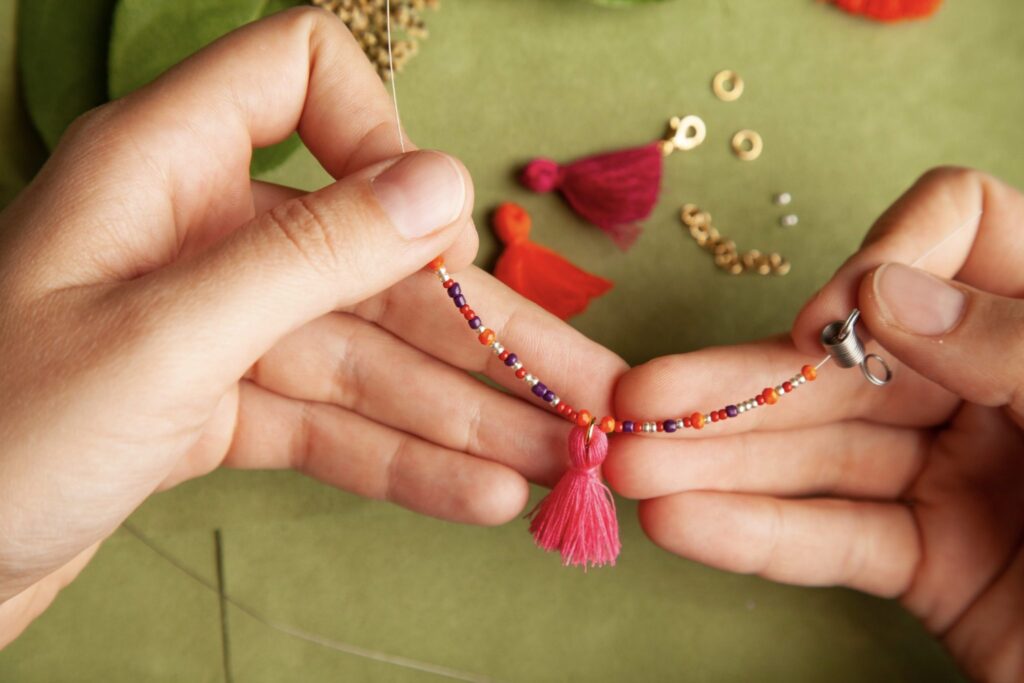
Step 3: After placing a tassel onto the middle of your beading wire, you will string on beads on both sides of the tassel, filling up your wire so that the beaded part wraps comfortably around your wrist. When you are done adding beads on one side, don’t forget to add a bead stopper before working on the other – we don’t want any beads accidentally slipping onto the ground!

Step 4: Check that you first strand is symmetrical before moving onto the second strand!
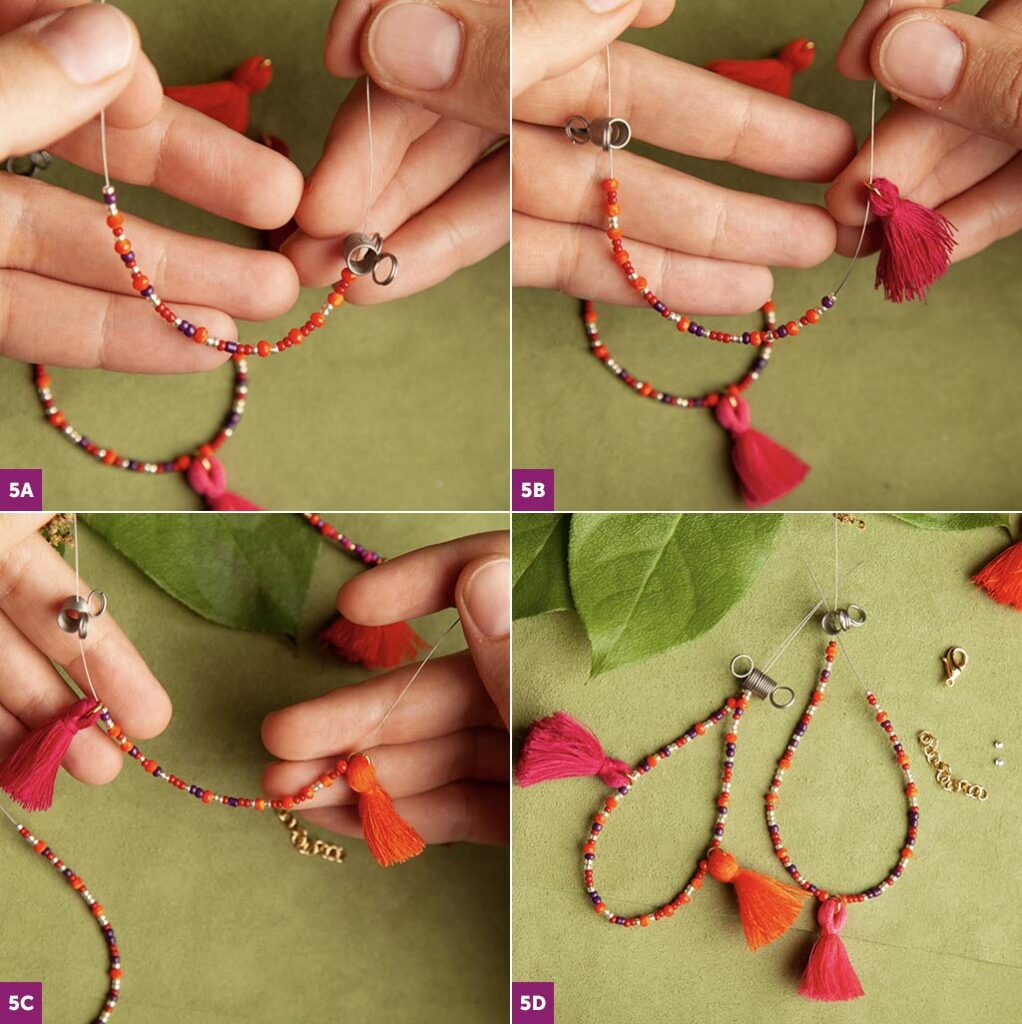
Step 5: The middle portion of the second strand will be beads instead of a tassel. So start by adding a bead stopper on one end of the wire, and beading about two and a half inches onto the wire. Then, you can add one tassel on each side, and continue adding beads until the length of your beaded portion matches the first strand of the bracelet.
Step 6: To create the closure you’ll need a lobster clasp, an inch-long piece of extension chain, and two crimp beads.
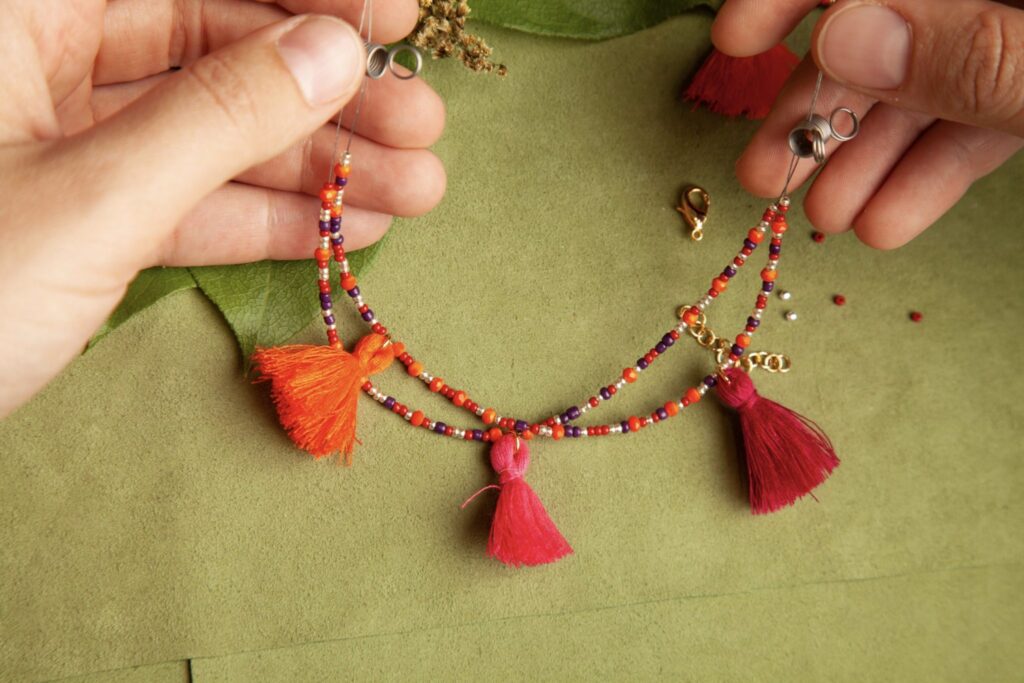
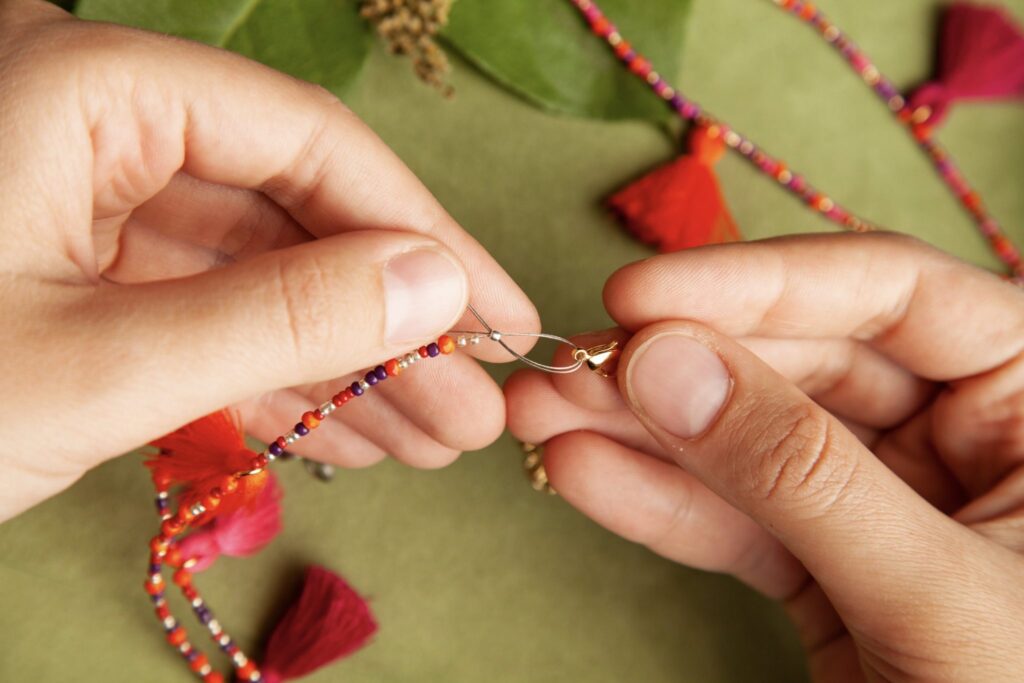
Step 7: Hold one end of each wire, and carefully remove the bead stopper from that side. You will be using the exposed 2 inches at the end of your wire to attach the strands onto the lobster clasp. Hold the two pieces of wire together, and slide a crimp bead on both of them at the same time. Add the lobster clasp on top of the crimp bead.

Step 8: Take the short, exposed pieces of beading wire and feed them back through the crimp bead, pulling them through, so that the lobster clasp has a bit of space to move in the loop created, but without exposing a lot of beading wire.
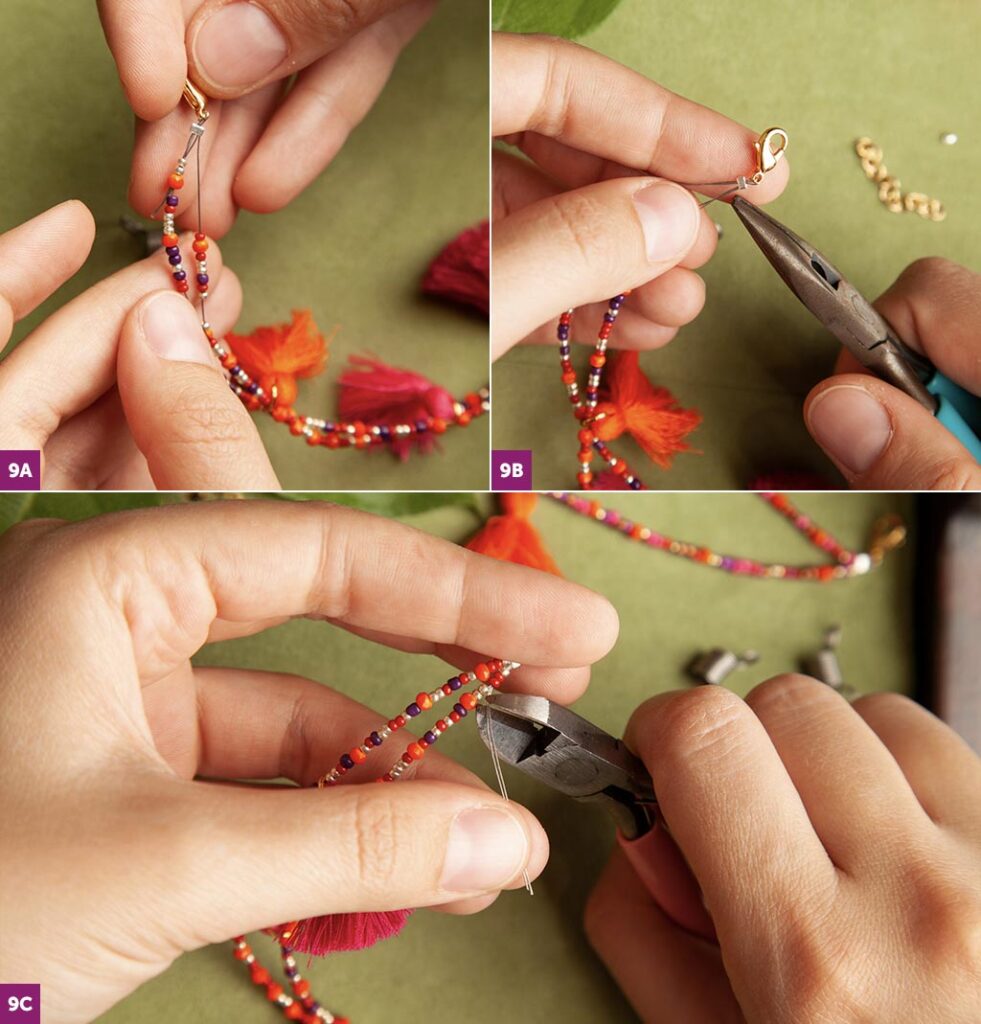
Step 9: Tuck the tails of the beading wire into the last 3-4 beads of your strand. Use your chain nose pliers or crimping pliers to flatten the crimp bead. Once the crimp bead is sturdily flattened (or “smooshed” as our students like to call it) you can use your wire cutter to trim the extra beading wire.
Step 10: Repeat steps 7-9 on the extension chain. Make sure to pull the wire through well enough so that there’s no beading wire exposed at any part of your bracelet design. Crimp and trim – and with that you’re done!
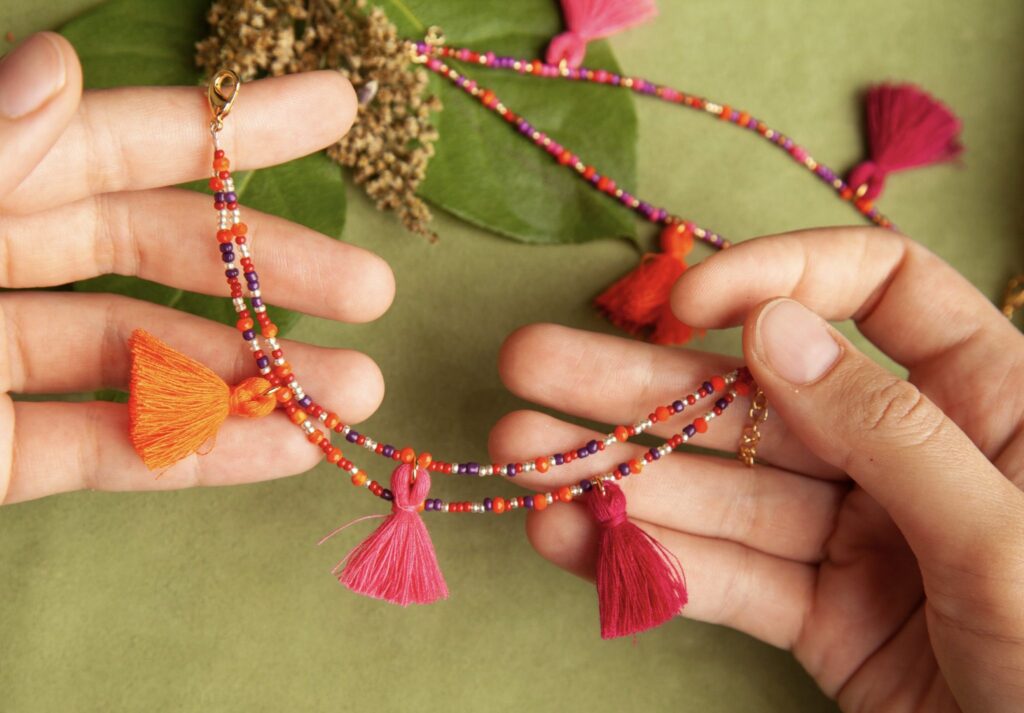
We’re inspired by YOUR creativity! Show off your Two-Strand Tassel Bracelet on social media!
Need some Happy Mail? Join our mailing list to stay updated on the latest Dragonfly Designs news, latest offerings, and special promotions!
© 2023 Dragonfly Designs. All Rights Reserved | Proud to be a Woman-Owned Small Business

Join our mailing list today and also receive a FREE, beautifully illustrated coloring e-book. Time to unlease your creativity!