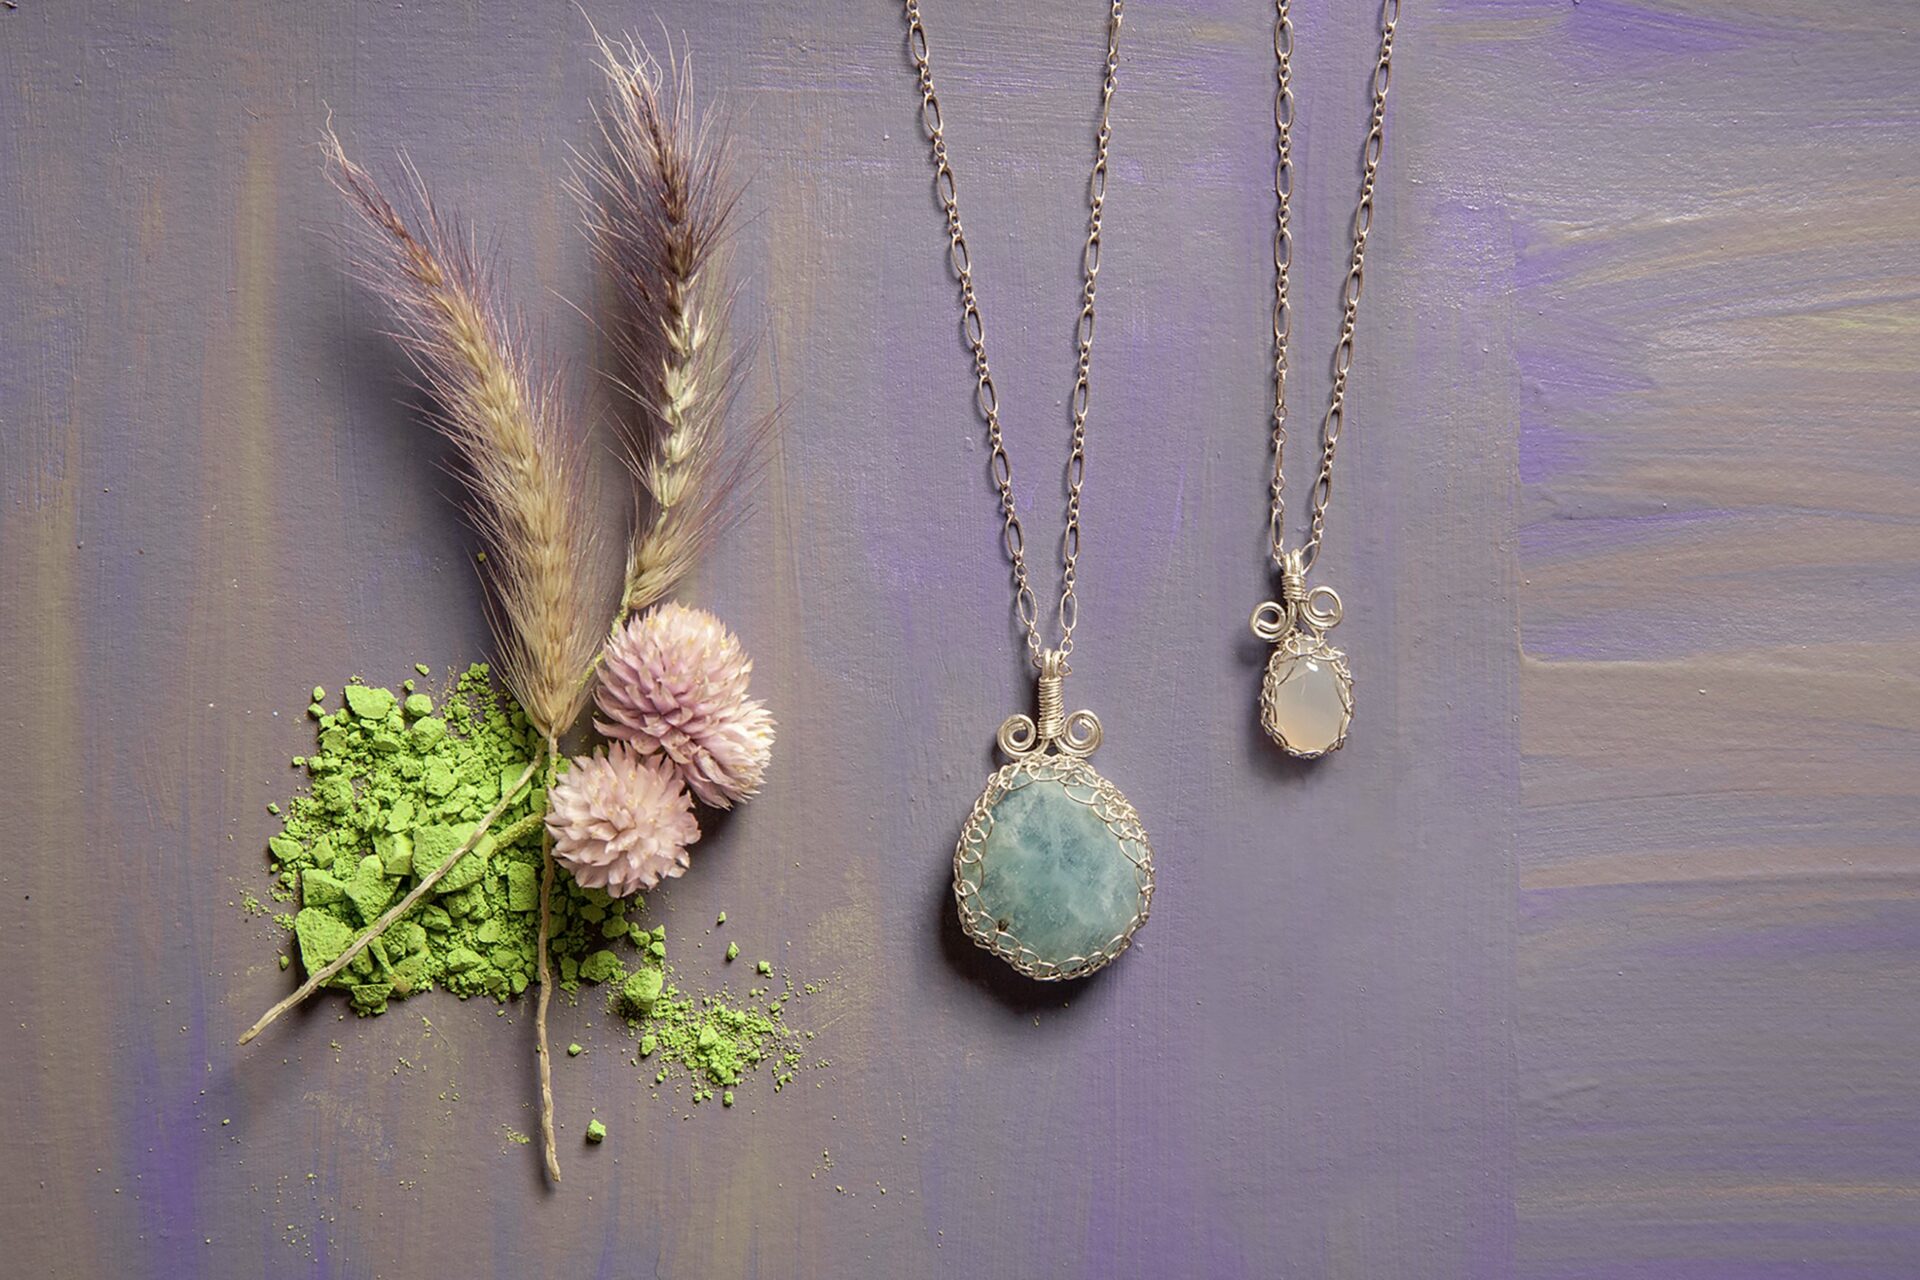
Ready to step up your jewelry-making game? Time to try your hand at creating a beautiful Netted Bezel Pendant Necklace! What is a netted bezel, you ask? In jewelry terms, a bezel setting encircles whatever stone is inside. It’s a very secure setting that lends a unique look to your jewelry! The “netted” aspect is a beautiful touch that adds extra security, delicacy, and flair to your necklace.
This jewelry project takes some patience and a gentle hand, and the results are totally worth it! Your Netted Bezel Pendant Necklace will add flair to your next outfit, or a meaningful gift for a friend. Enjoy the meditative feel of making your very own netted bezel using the instructions below.
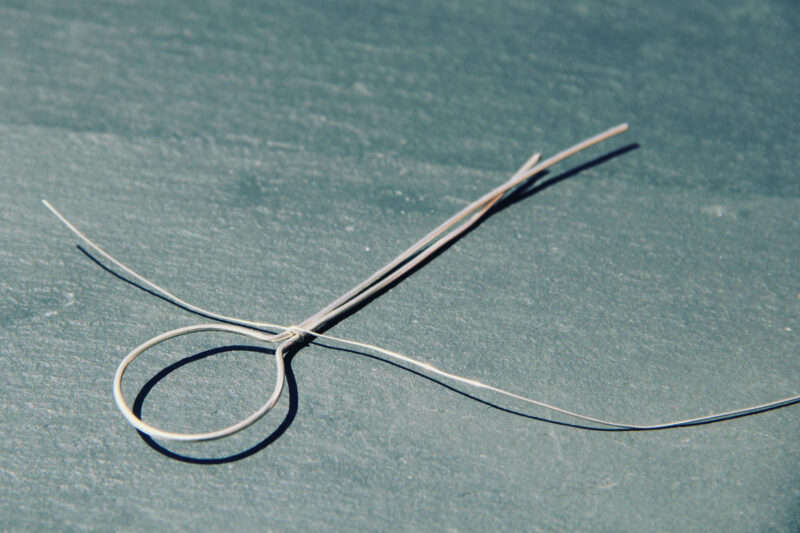
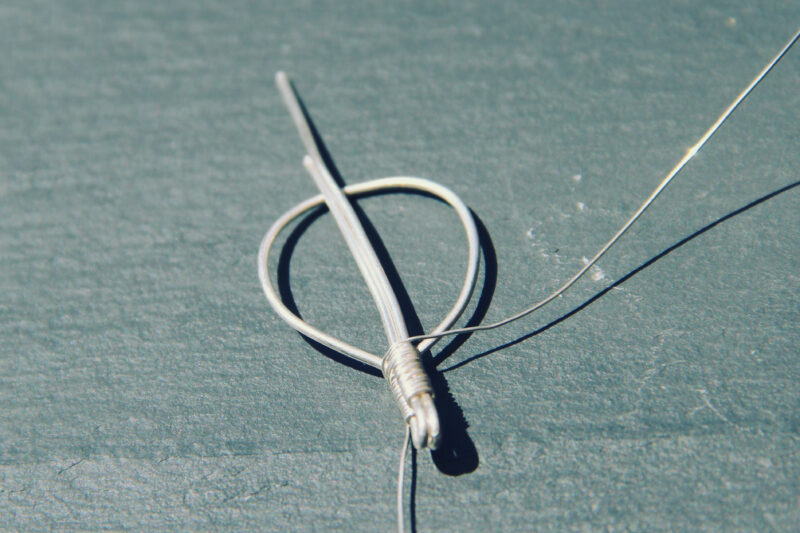
Step 1: Use 20 gauge wire to make the frame. Gently fold the 10” piece of wire in half, creating a round shape by bending it with your fingers where your cabochon will fit snugly.

Step 2: Use 28 gauge wire to coil the frame. Start by wrapping your 28 gauge wire (starting at the middle of the length you’ve cut) around both pieces of 20 gauge wire, until you reach the top one inch of the frame.
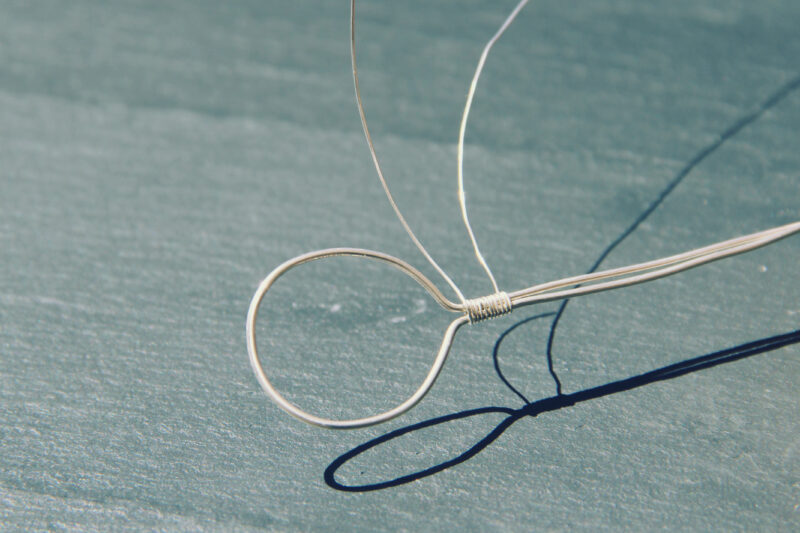
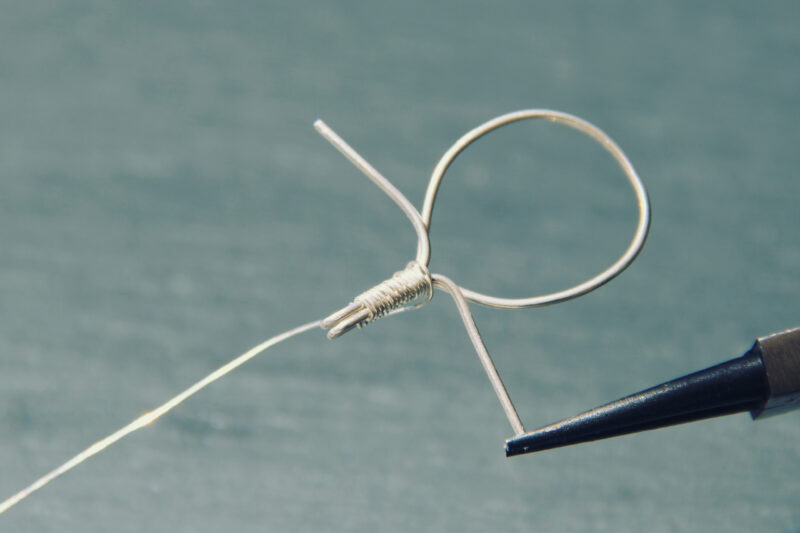
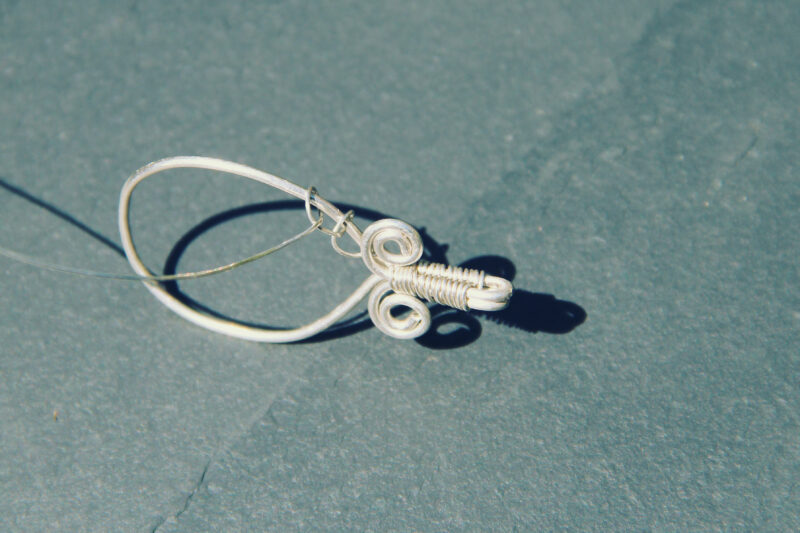
Step 3: Use one side of your 28 gauge wire to form the bail by wrapping it around both wires of the frame – stop when you reach the top one inch of the frame.
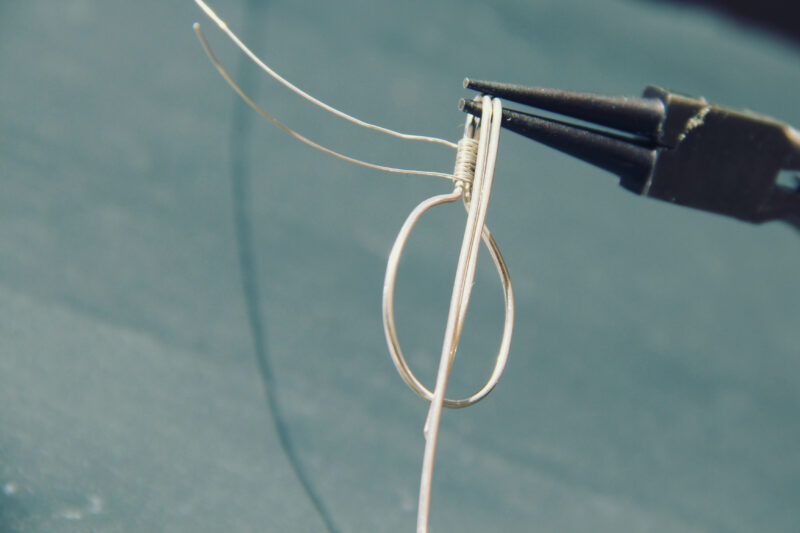
Step 4: Curve the bail towards the front slightly, by using round-nose pliers. Here you will wrap the ends of the 20 gauge wire separately, using the two tails of your thin wire.
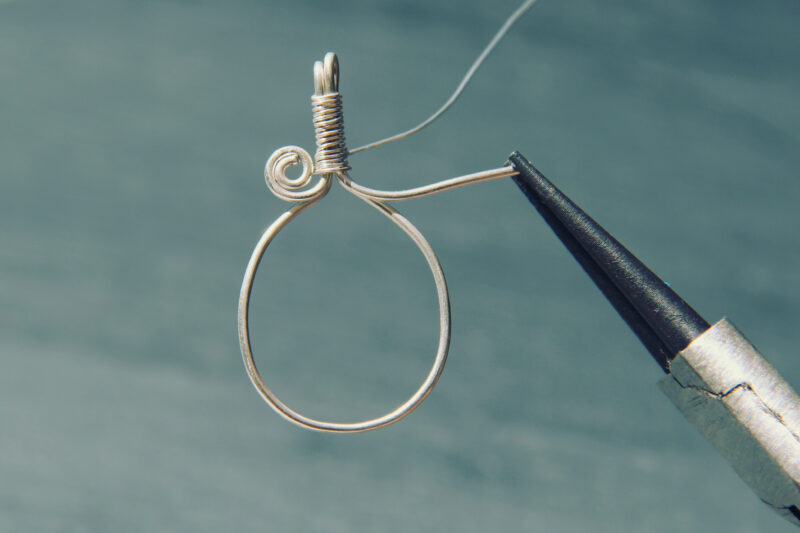
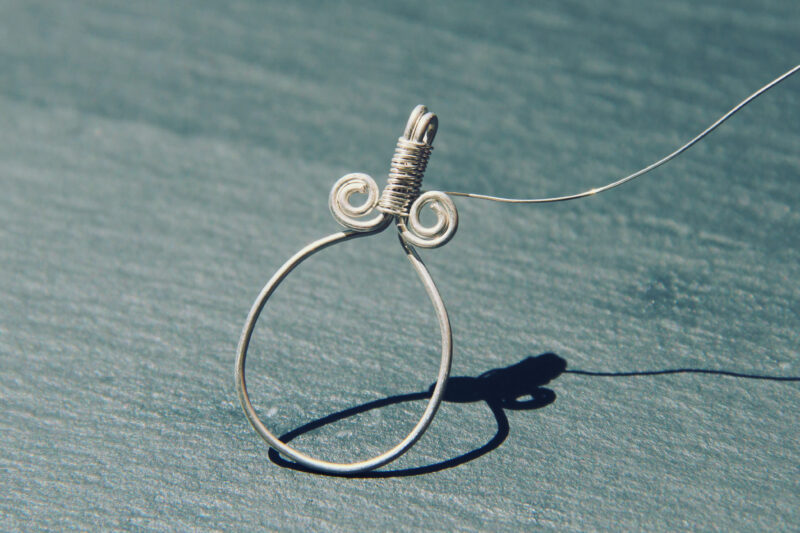
Step 5: Form two spirals with your round-nose pliers and close the bail by wrapping it onto the frame with the 28 gauge wire.
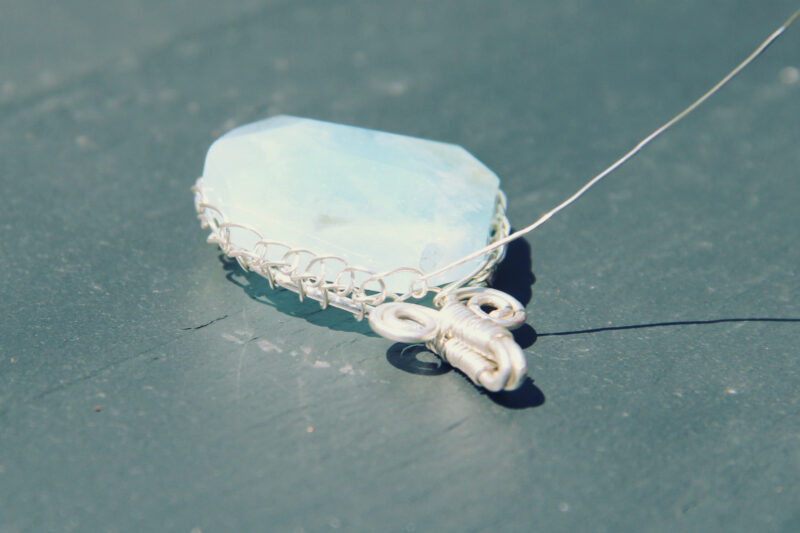
Step 6: Cut one piece of 3 feet 28 gauge wire. Attach the wire to the frame by wrapping it tightly right next to the bail. Leave a 1-inch tail next to the bail and use the long tail to create the net for your cabochon.
Step 7: Start to form the first stitch of the net by wrapping it over the edge frame and back into the loop you created with the wire.
Step 8: Pull the wire to form the first stitch of the net – make sure you don’t pull too tight, but also that your stitch is small enough to achieve the dainty, elegant look we are going for.
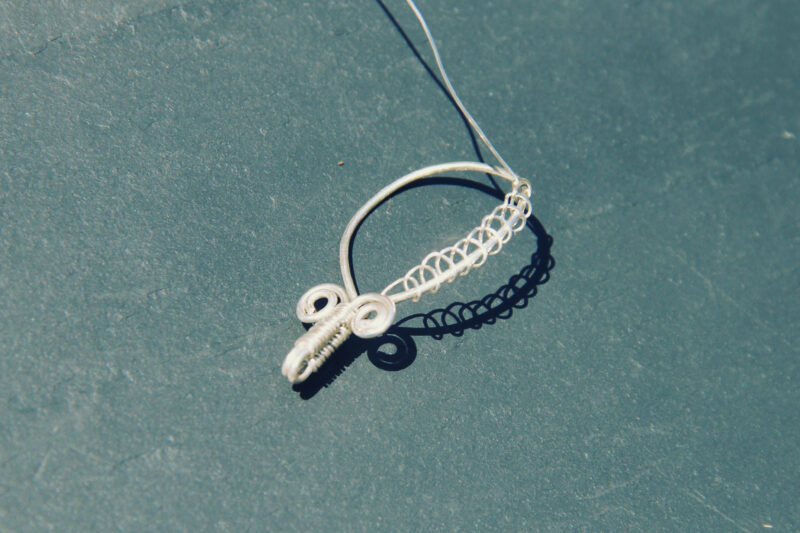
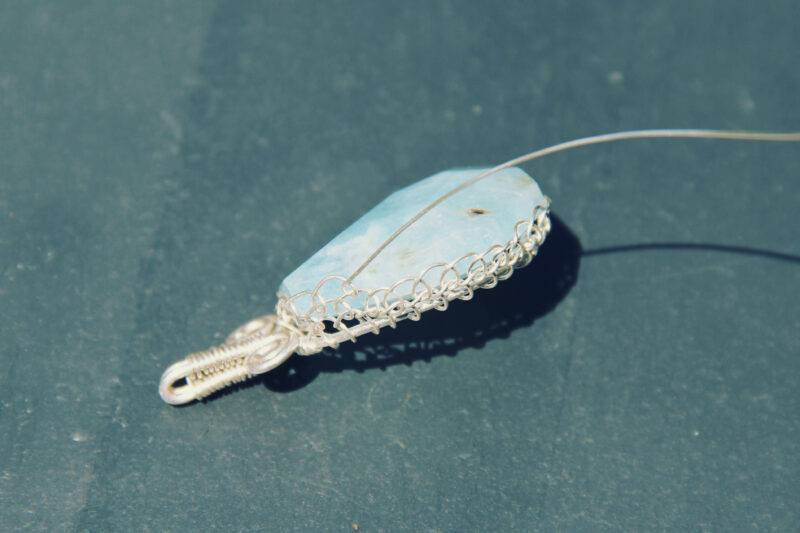
Step 9: Continue forming stitches and loops by repeating the previous steps. Form the first row of stitches around the frame.
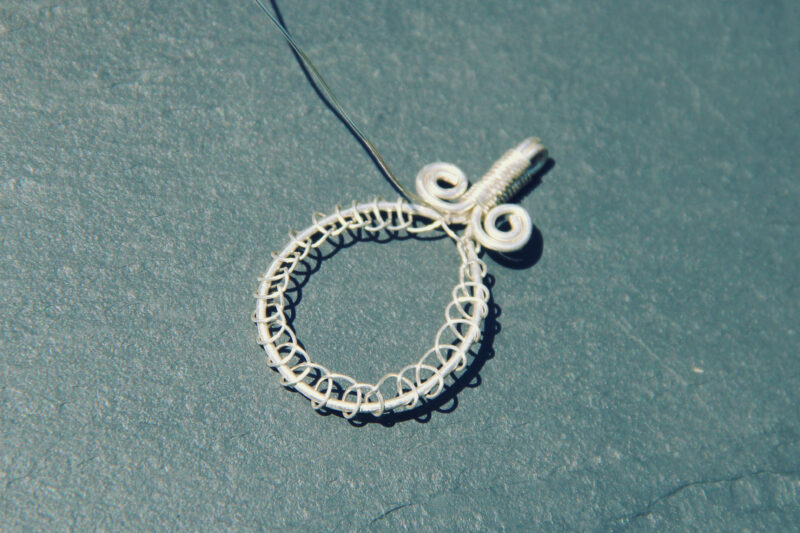
Step 10: Put the stone in the frame and continue to form the second row of loops. For the second row, you will be looping your wire into the first row that you have stitched, rather than the frame. Make sure that you are pulling the wire so that it snugly fits around the shape of your cabochon bead.
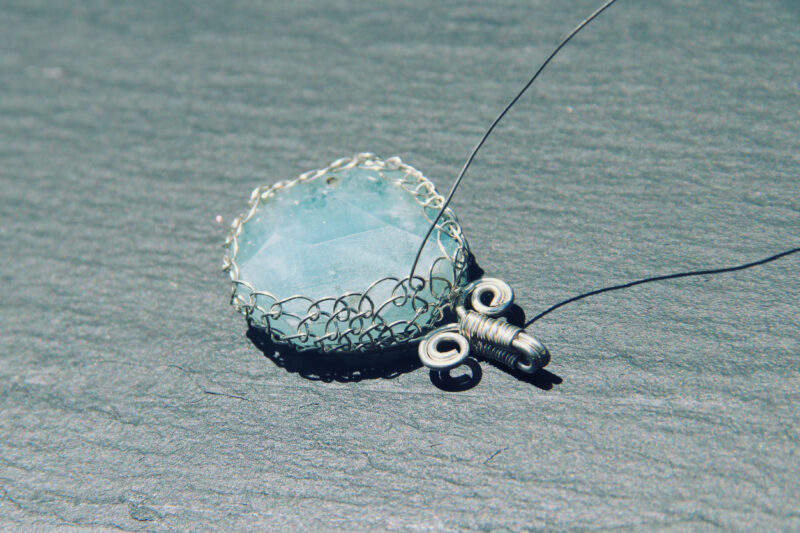
Step 11: Finish the third row the same way you created the second one. Optional – at the fourth row you can add tiny seed beads onto every stitch to give your pendant some extra sparkle!
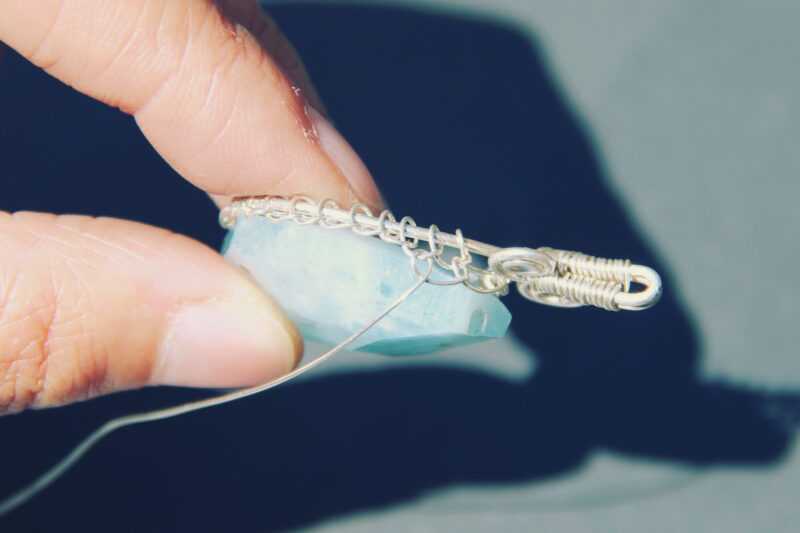
Step 12: Once you have enough rows stitches to hold your cabochon securely in place (this will depend on the size you are working with), you can complete the pendant by wrapping the two ends of your 28 gauge wire securely in place and cutting them with your flush cutters.
Step 13: Wear your creation with pride or gift it to a special fashionista in your life!
We hope you’ve enjoyed learning how to create a Netted Bezel Pendant Necklace, and we would love to see your masterpiece. Please share your finished creations with us on social media! Tag us on Instagram @hellodragonflyfun, then browse our collection of DIY jewelry-making kits to continue creating.