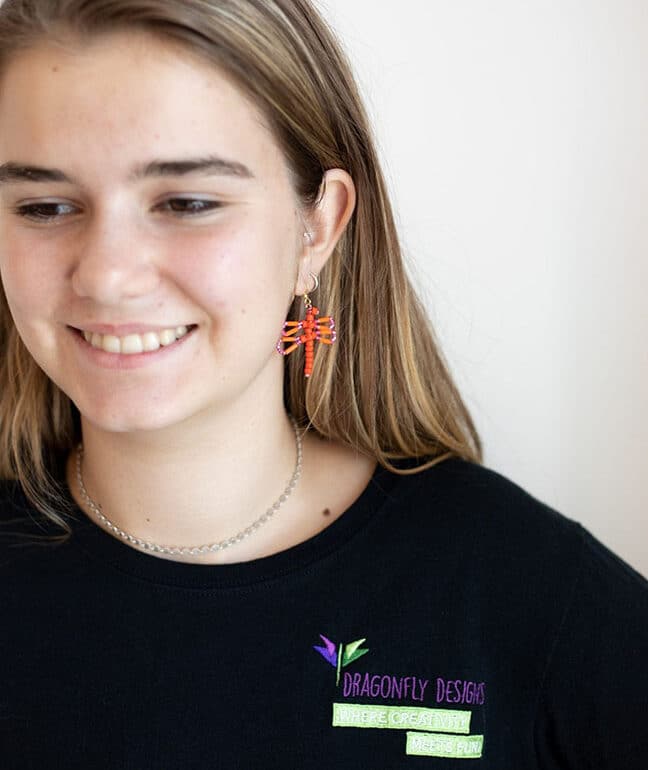
Dragonflies. Their name comes from an ancient belief that they were once actual dragons. (For the record, we’re not here to argue.) If you look up the symbolism of dragonflies across the world and throughout history they have quite an impressive resume. Try it, and you will find phrases like “Power and Poise, “Maturity and depth of character,” “Living in the moment,” “Focus,” and “Defeat of self-created illusions.” Why yes, please, we’ll take any one of those! The varied and powerful forces associated with this magical creature are just one of the reasons we chose it as our namesake. Now, you can wear the strength of their symbol on any occasion with these dragonfly earrings!
We teach this project in our classes with kids, and they always love it!
One of our students elected to turn their dragonfly into a ring! The ring instructions are available here in PDF form.
We love seeing kids so confident and proud of their work. With something easy like beaded dragonflies, they get to see the fruits of their labor nearly immediately! It takes a few minutes, but it’s so fun to watch them run with it when they get the hang of it. Oftentimes, they make their first dragonfly and then get inspired to start making a whole bunch! We let them run with it; we make rings, earrings, pendants, you name it! Whatever the kids can dream up, we make sure to make it happen. We teach the beaded dragonfly classes in our camps and after school programs.
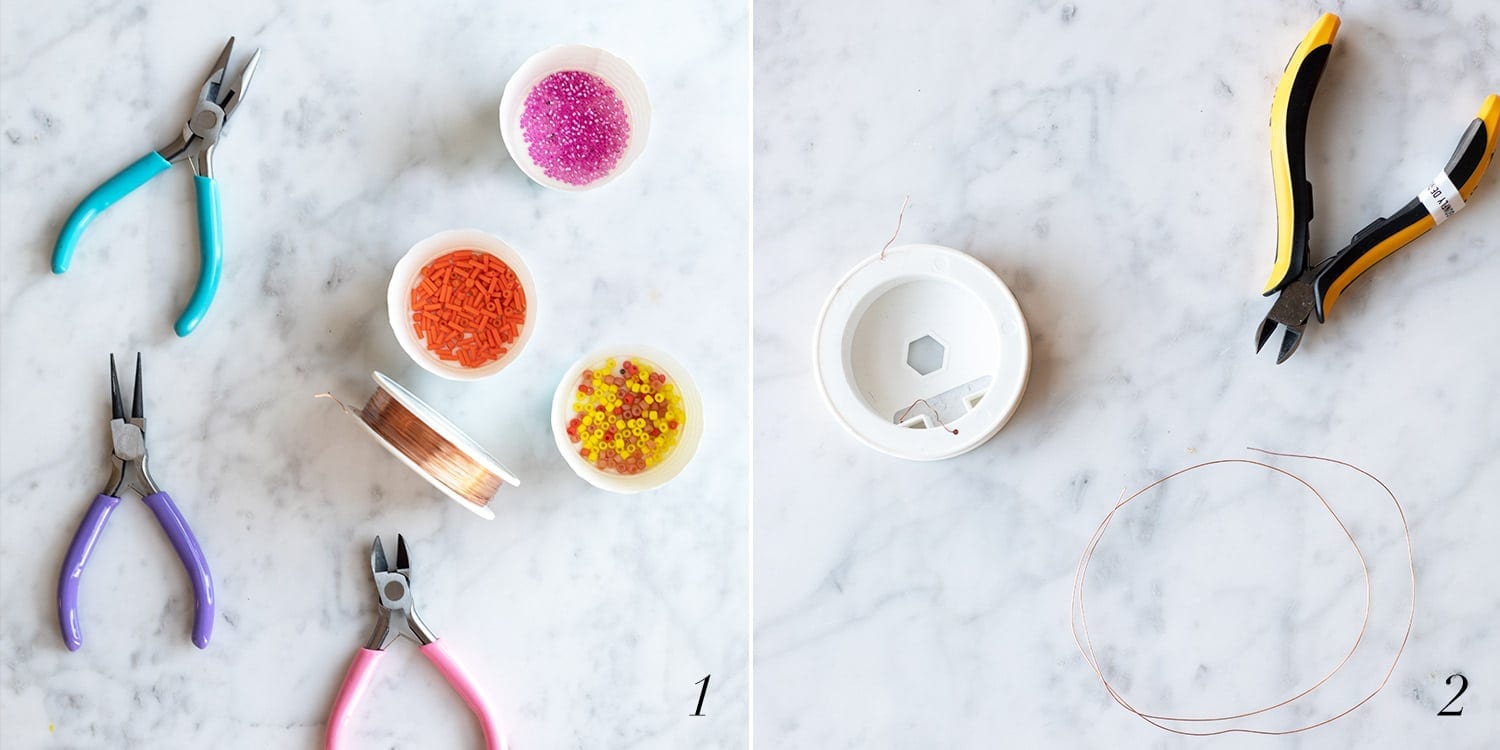
Step 1: Let’s gather our materials. We need three types of pliers and three types of beads. We need flesh cutters, flat nose pliers, and round nose pliers. The beads we need ate size 6 seed beads, size 11 seed beads, and size 5 bugle beads. Our size 6 seed beads are for the dragonfly body, and the size 11 seed beads are for the wings (and two for the eyes).
Step 2: Use your flush cutters and cut the length of the wire.
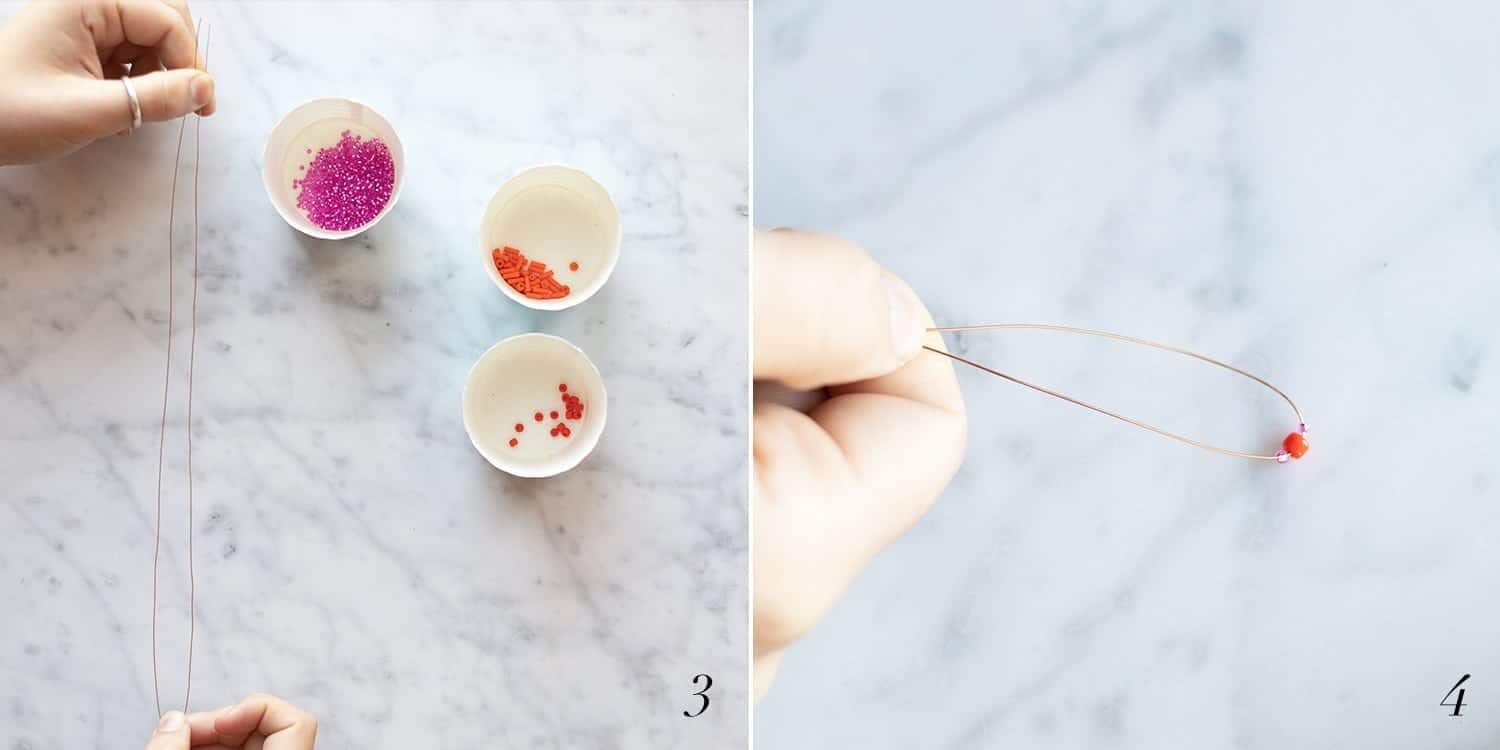
Step 3: Pull your wire so there is a gentle bend in the dead center of the wire. We want both sides to be equal in length!
Step 4: Thread your size 6 seed bead, which should be the color you want for the head of the dragonfly. Then, string two size 11 seed beads for the eyes.
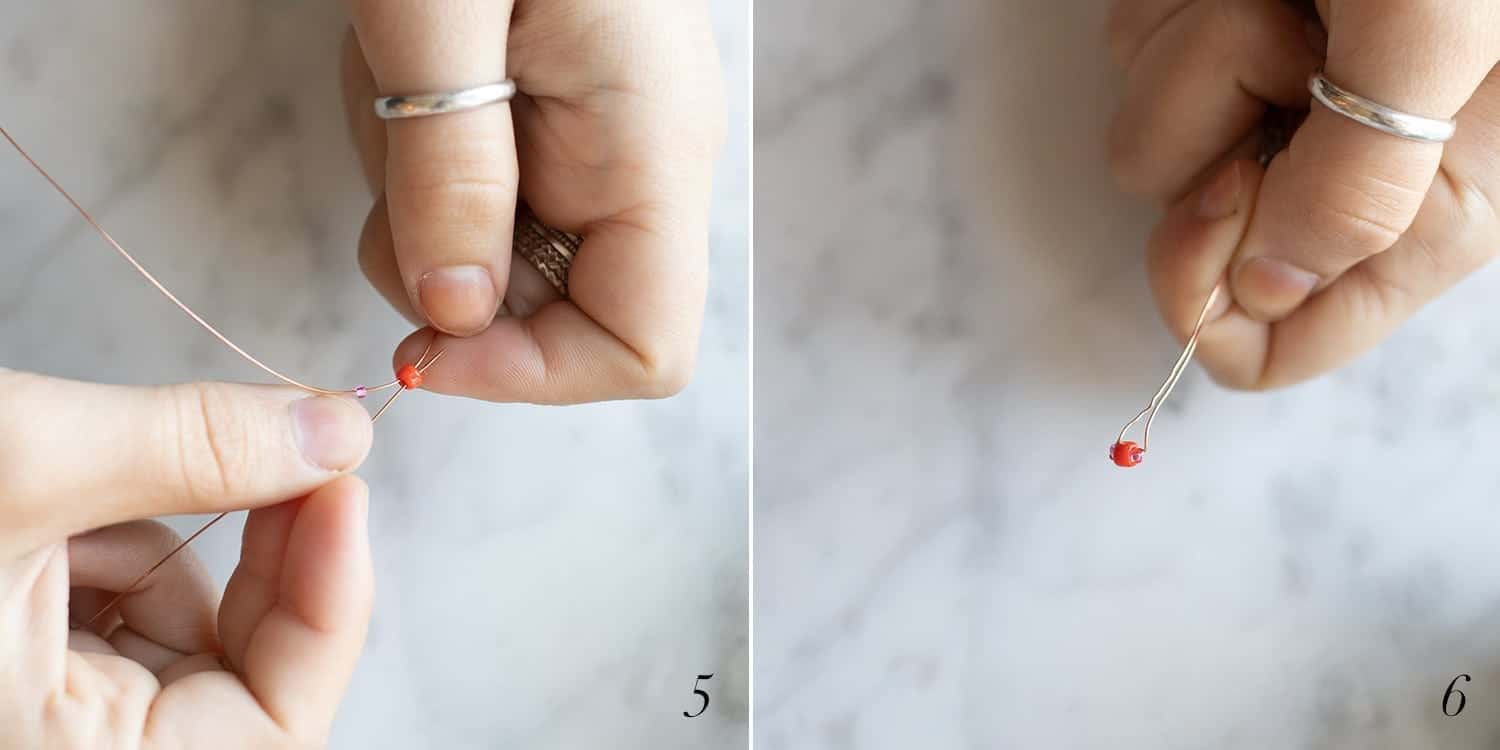
Step 5: Take the two lengths of wire and string each through the size 6 seed beads so that the eye beads are turned, and the two wires are woven through the center head bead.
Step 6: Once the head is formed, pull the two lengths of wire tight around the beads so that it’s easy to string a size 6 bead over the two strands
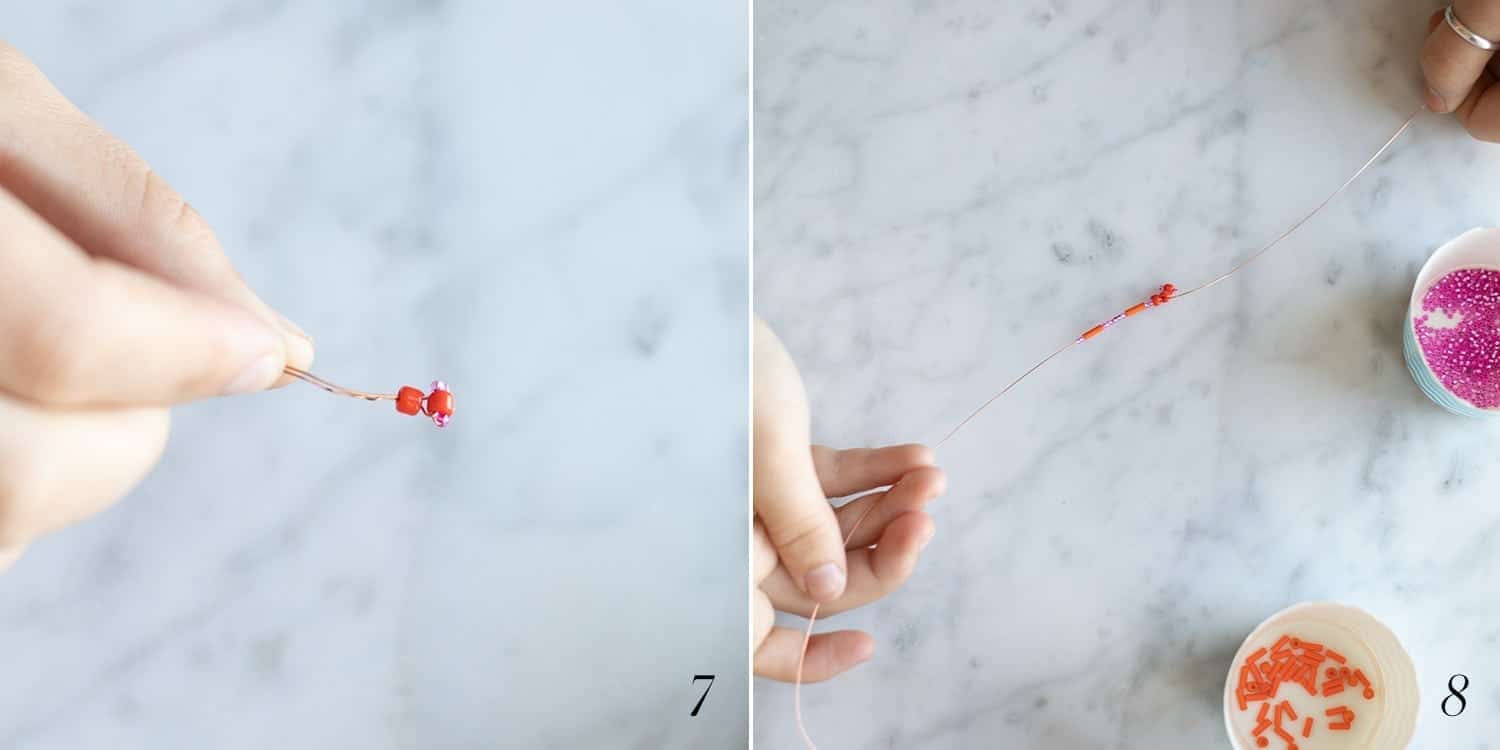
Step 7: Now that the head is formed, string a size 6 bead onto both wires, pulling it up tight against the head.
Step 8: Pull the two wires apart, ensuring that the first body bead is nestled up against the head, and begin to string the wing beads on. Put one size 6 bead, then one size 11 bead, followed by one size 5 bugle bead, then five size 11 beads, one more bugle bead, and lastly, one more size 11 seed bead.
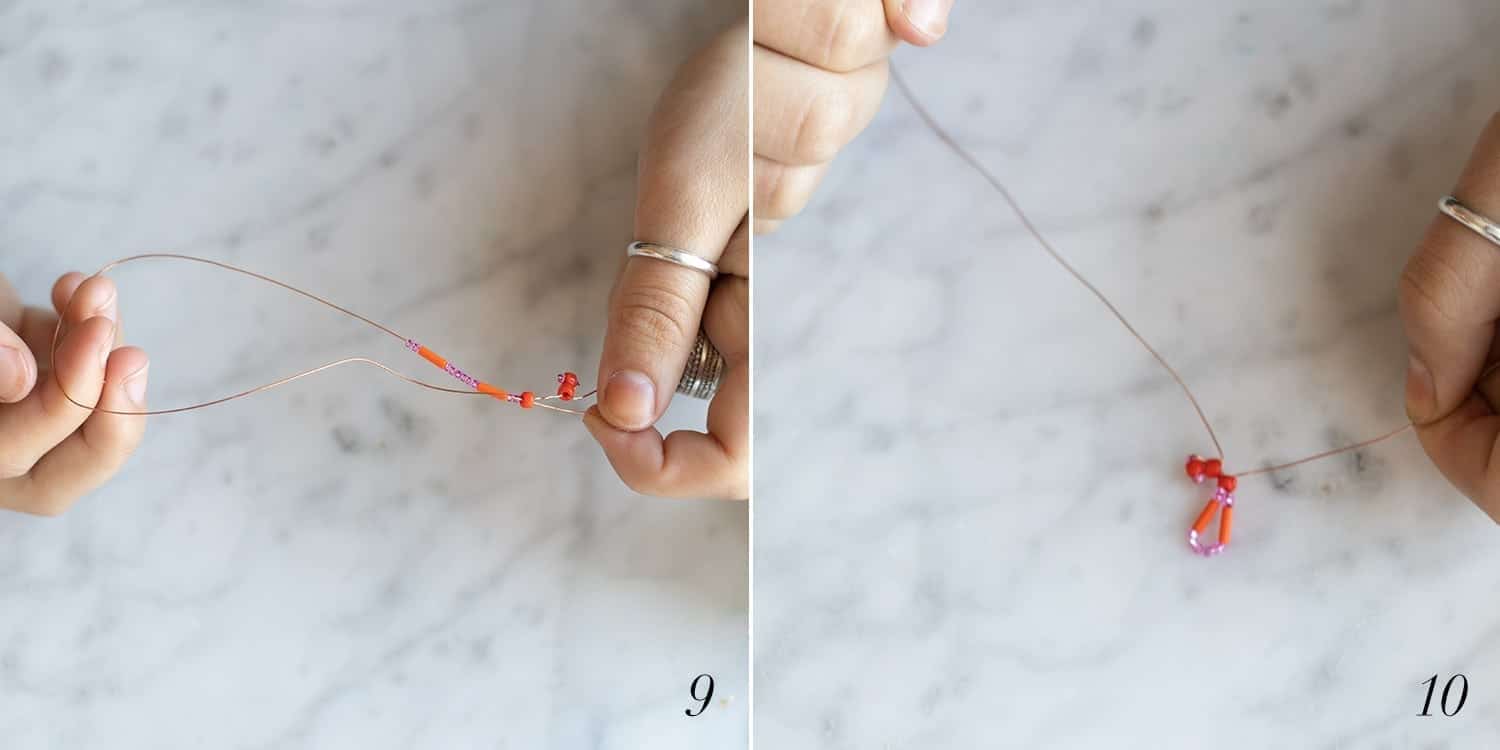
Step 9: Push your string of wing beads up against the body of the dragonfly, and place the wire thread back through the first size 6 seed bead.
Step 10: Pull slowly and tightly, ensuring the wing forms without any twisting or kinks forming in the wire.
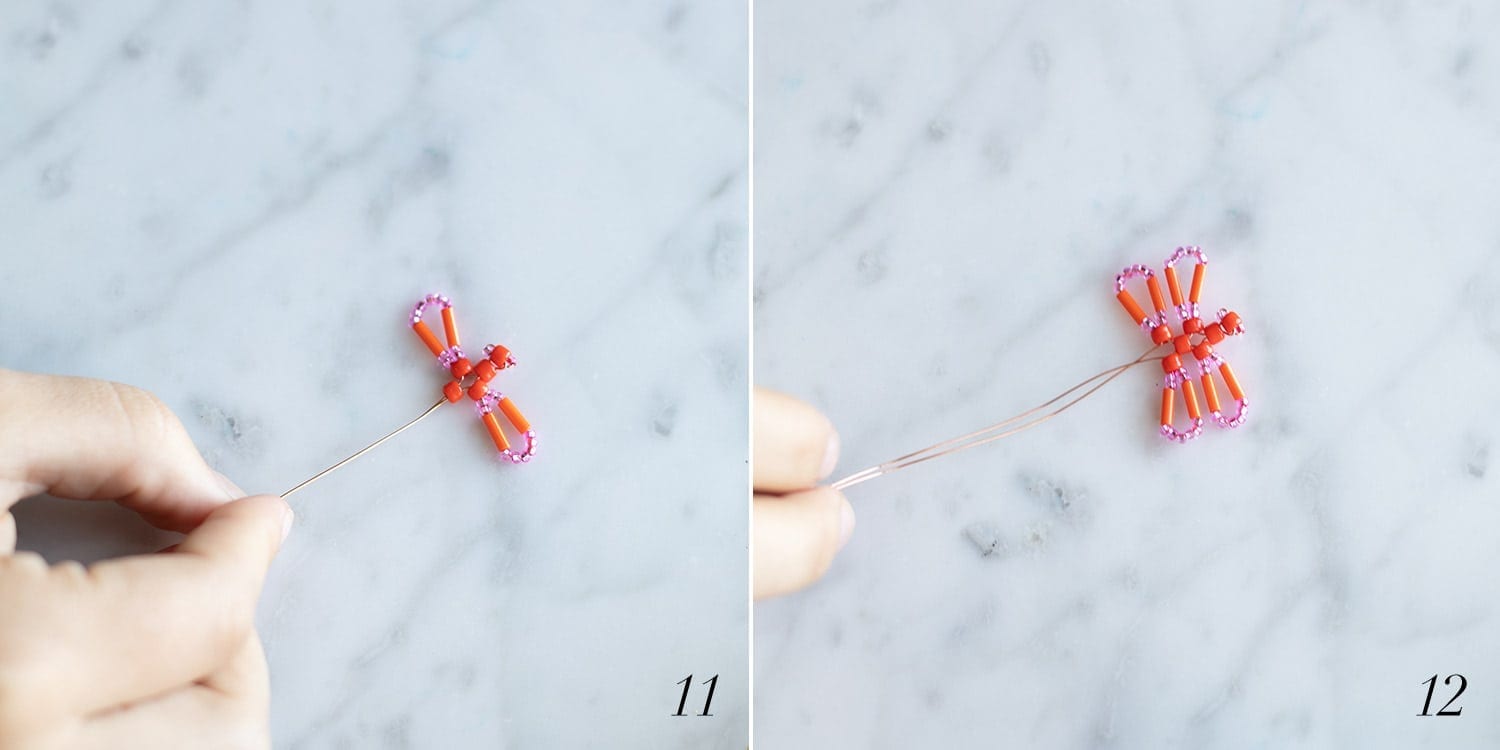
Step 11: Repeat this same process with the other length of wire, making two happy little wings! Once your wings are complete, add one more size 6 body bead to both wire strands. Pull it up close to the wings, keeping your dragonfly tight.
Step 12: Now that you’ve mastered the wings, make two more! Dragonflies have four beautiful wings, and these are no exception!
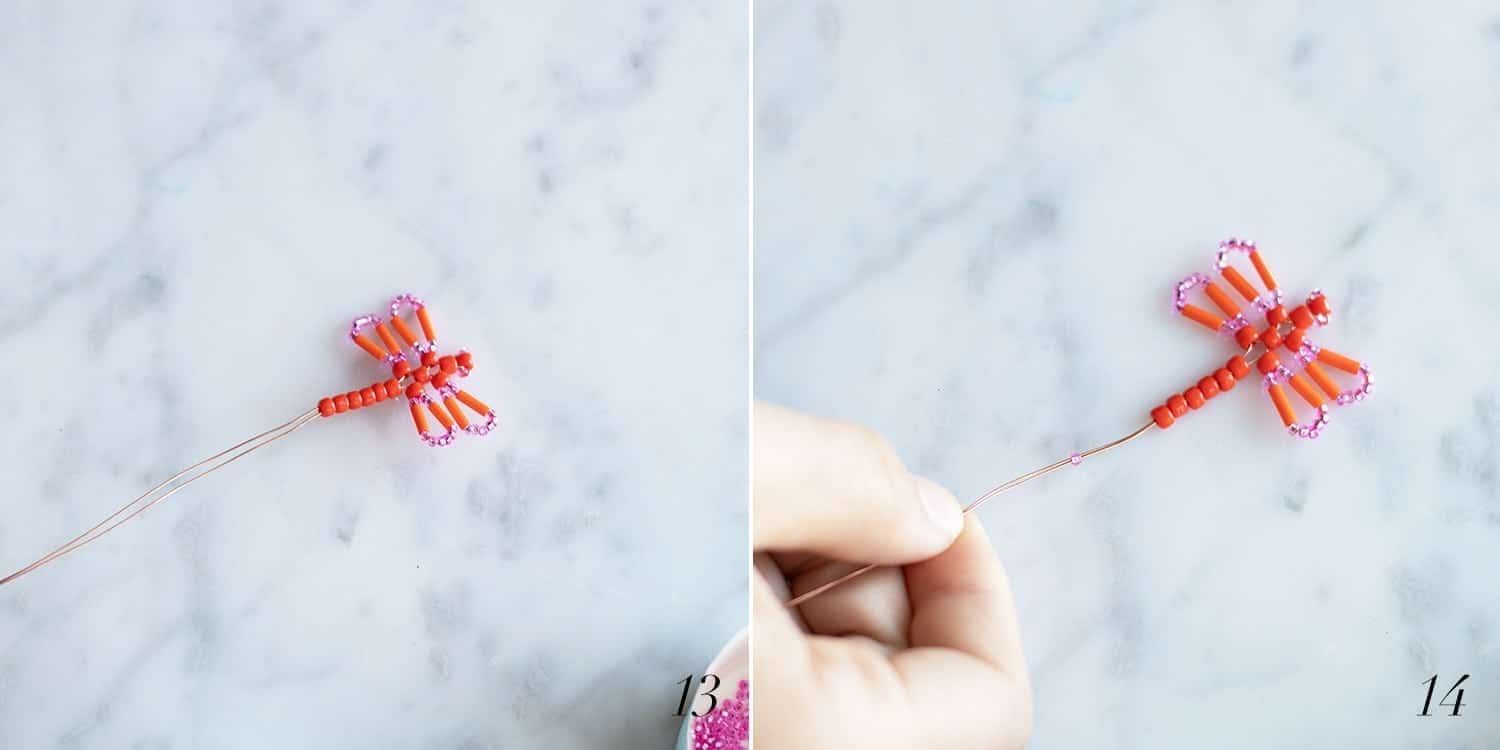
Step 13: Once you have those wings made, pull the two strands of wire back together and string six size 6 seed beads, completing the length of the dragonfly body.
Step 14: Carefully thread both lengths of wire through a single size 11 seed bead, making sure not to crimp or fold the wire as you run it up the wires.
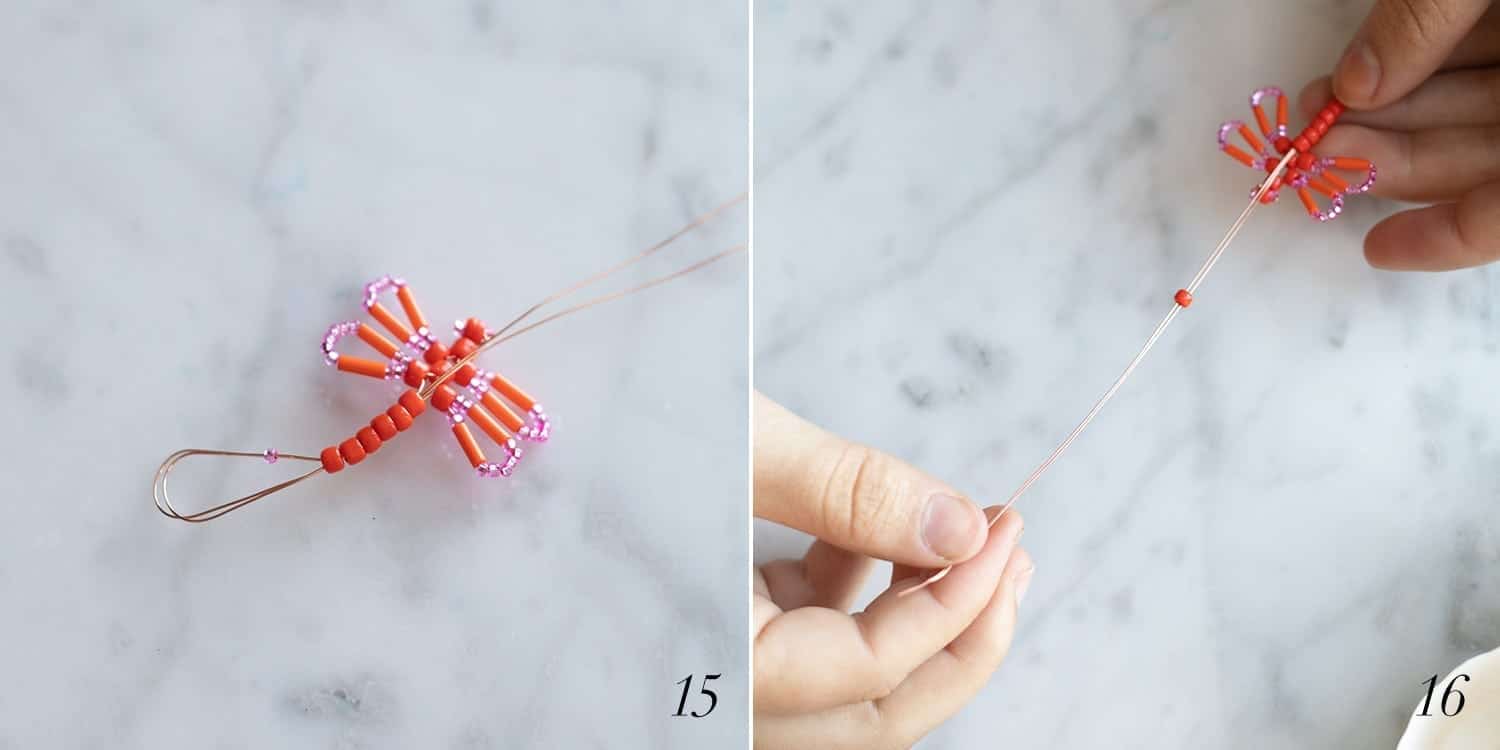
Step 15: Slowly but surely, thread both strands of wire through the six tail body beads. Take your time and make sure that the wire doesn’t fold or twist. Pull it in tight, nestling the size 11 seed bead against the base of the tail beads.
Step 16: String one size 6 seed bead that is the same color as the body over both strands of wire.
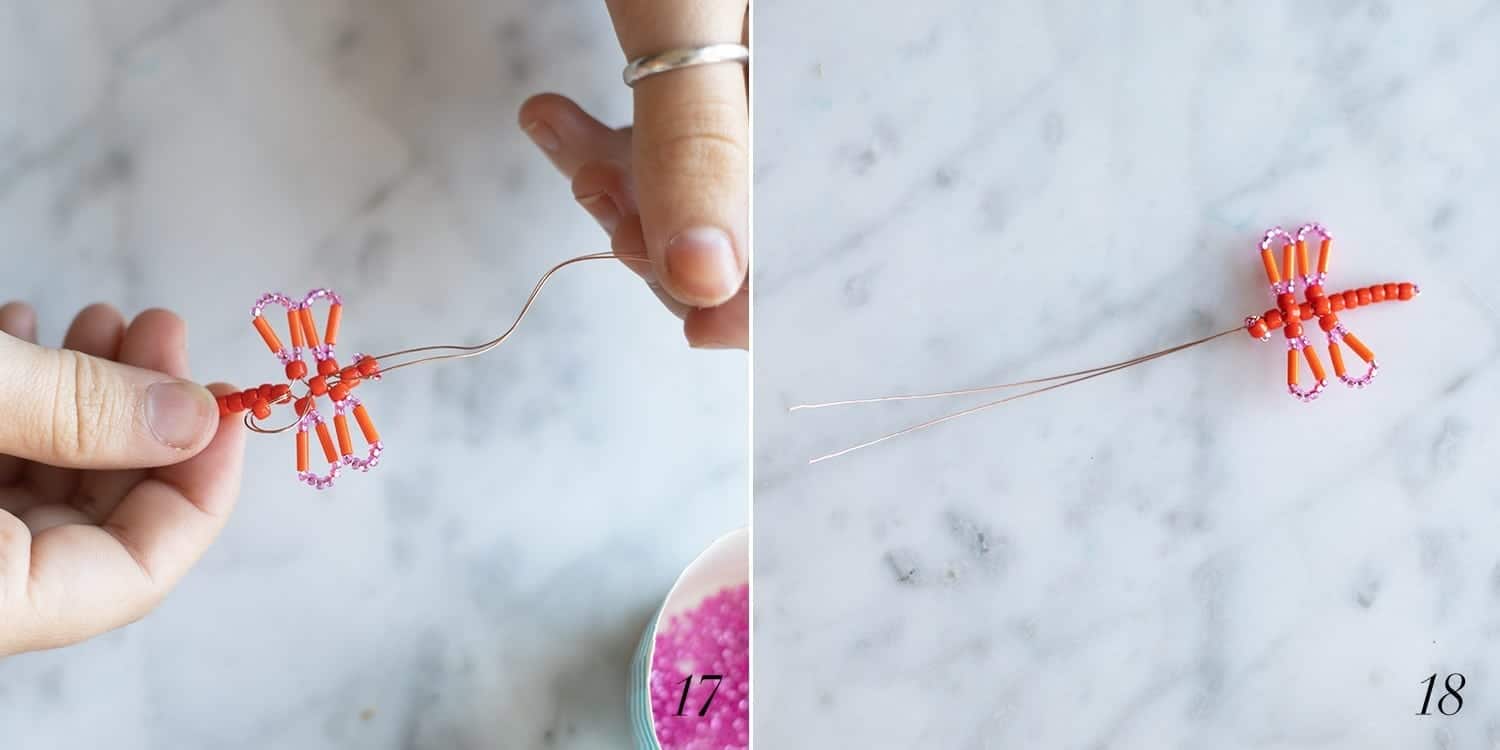
Step 17: String both wire strands through the middle body bead, pulling it tight so the bead nestles in the space between the wings — we want it to look like a congruent body, not like there are Swiss cheese holes in our dragonfly.
Step 18: Pull both strands of wire through another size 6 seed bead, repeating the process for the second set of wings too. From here, pull the two strands of wire through the size 6 bead that is seated directly beneath the head. These will serve as the loop for your earrings!
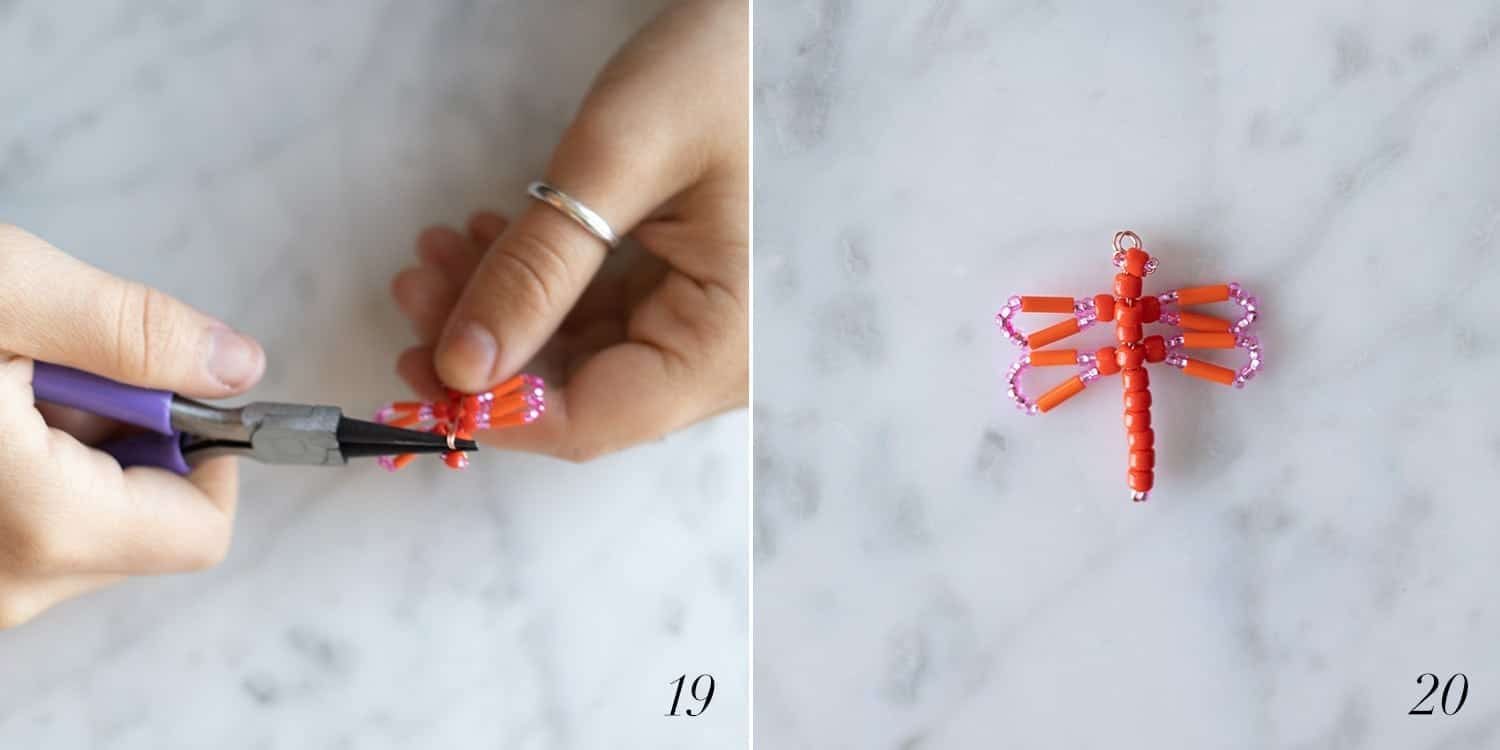
Step 19: Using your round nose pliers, make a loop with both strands that you just pulled through the bead beneath the head. Curl the wires into a nice loop, and use the small strand leftover to create a triple twist around the base of your newly formed loop.
Step 20: Once you’ve done that, you should have a single complete dragonfly. The loop on the top will serve as the attachment site for the earring hooks. Congrats! You made one dragonfly!
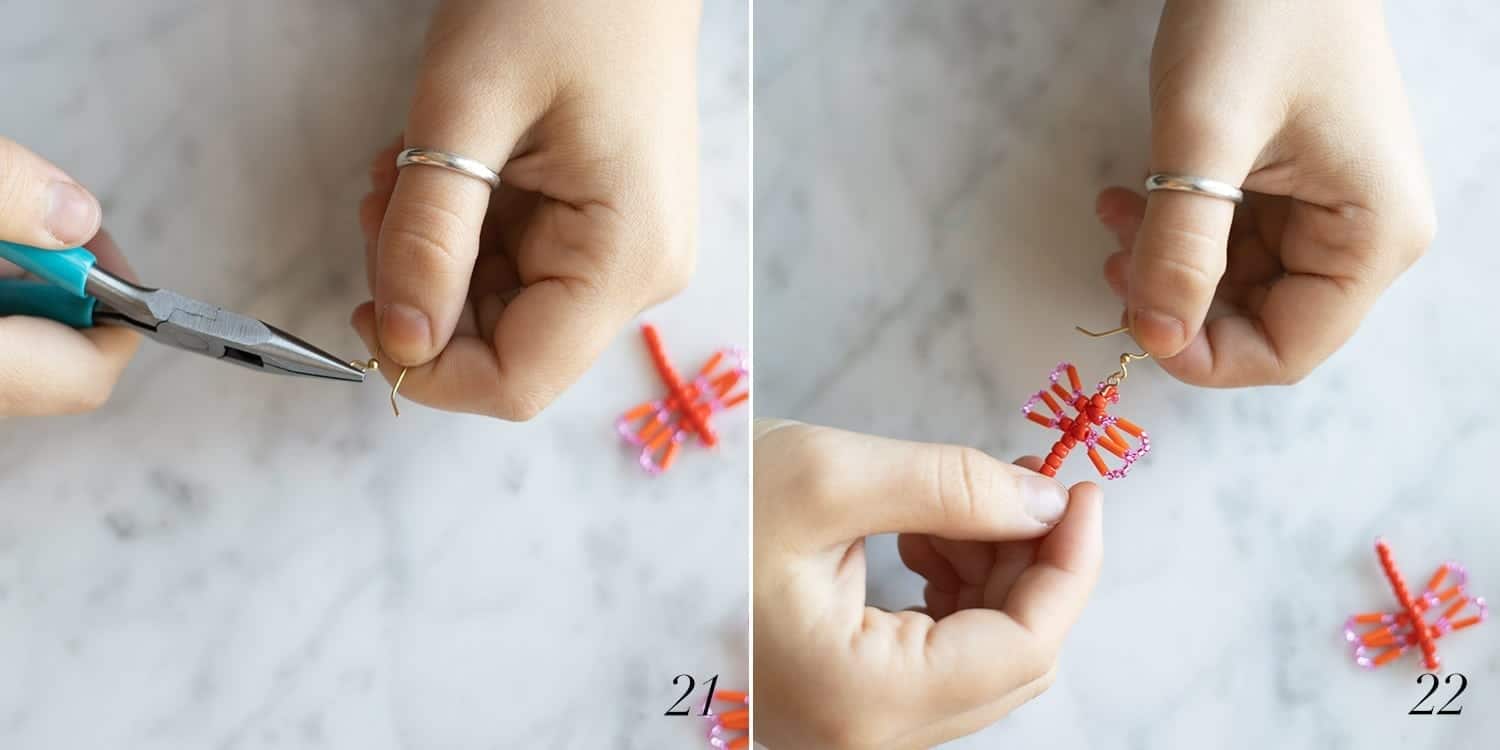
Step 21: Take your earring hook and flat nose pliers and gently twist the small circle on the bottom of the hook. If this is your first time doing this, look closely at the base of the circle—one side is attached, and the other has a small gap. You want to twist your pliers in the direction that will open the circle, not bend the wire that connects to the rest of the hook.
Step 22: Slip your dragonfly onto the circle, making sure it’s facing the right way and will hang appropriately when it’s on your ear! Once your dragonfly is on, use your flat nose pliers again to close the circle tight—the way it was originally. Voila! Earring one is done. Now that you’ve got the whole spiel, crank out another one! These earrings are sure to sparkle!
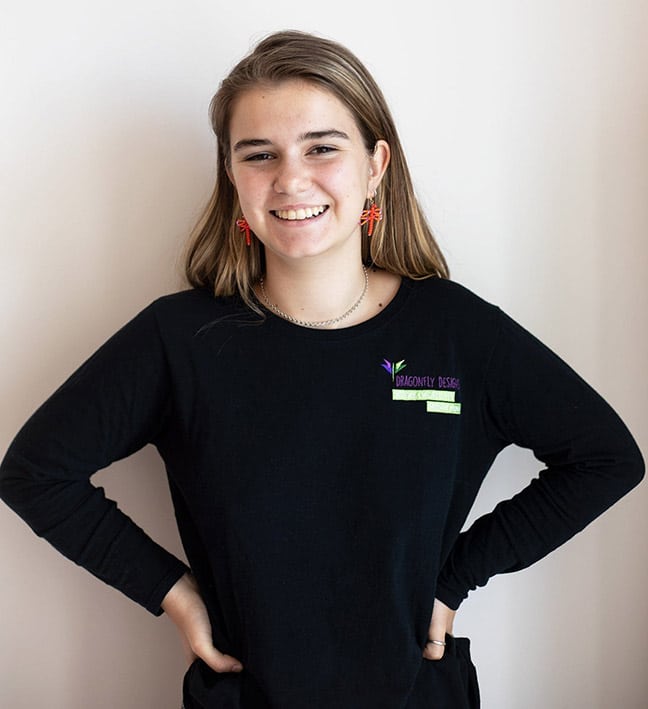
Because these earrings are made with wire and beads, you can make them any way you like!
If you have long, dark hair that you typically wear down, you may want to make the dragonflies a lighter color so they show up in your hair! Or if you wear your hair up, make them to match an outfit!
This Beaded Dragonfly Tutorial is just that: a spot of instruction to get you started. From here, it’s up to you to run with it and make it your own!
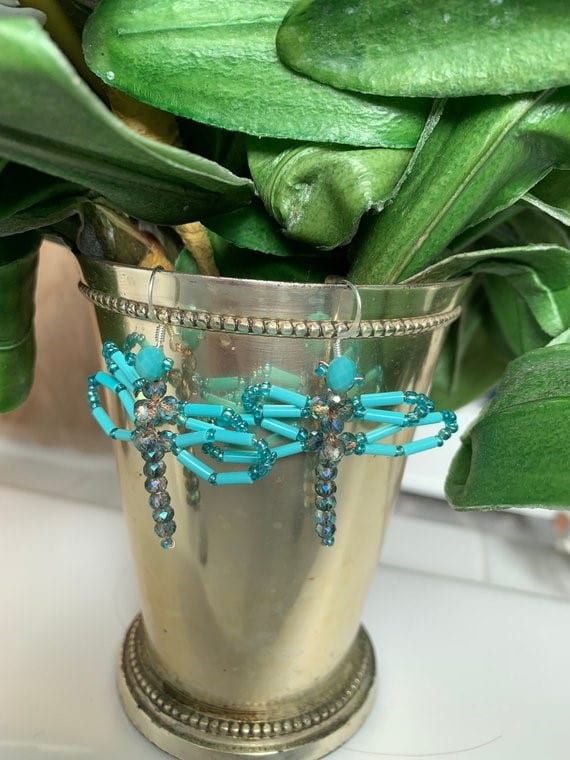
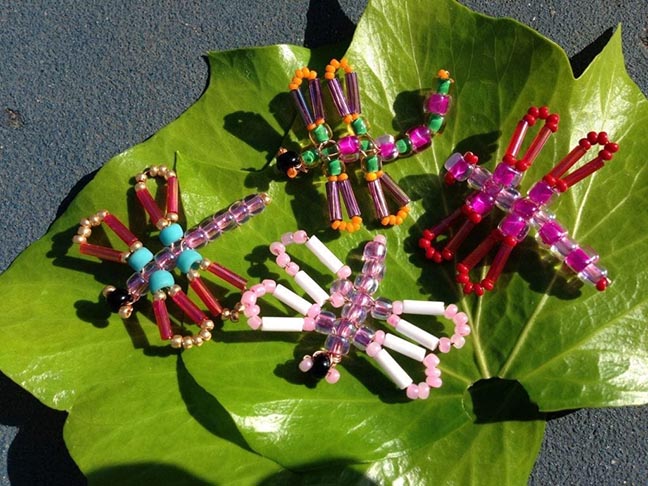
Check out these variations that kids made in our classes! Aren’t they gorgeous!? We love seeing what they come up with!
Join our mailing list today and also receive a FREE, beautifully illustrated coloring e-book. Time to unlease your creativity!