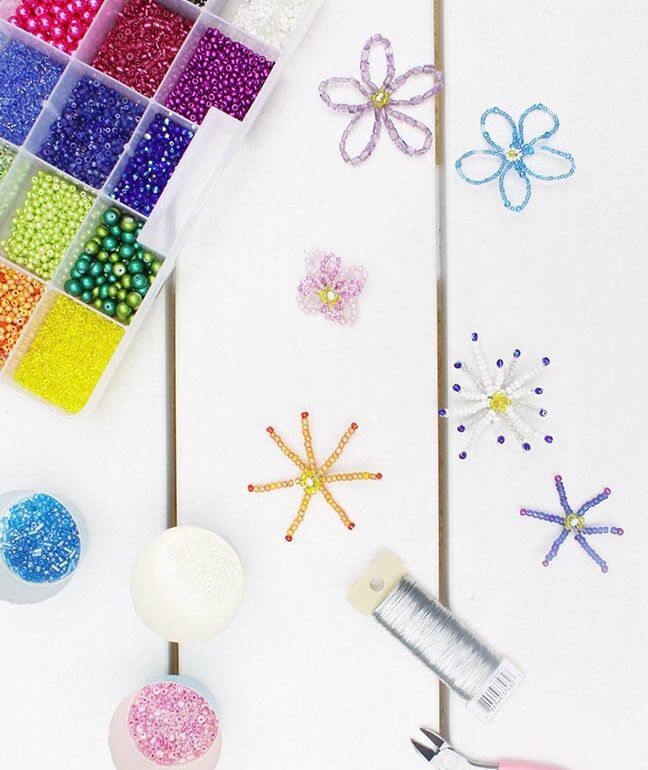
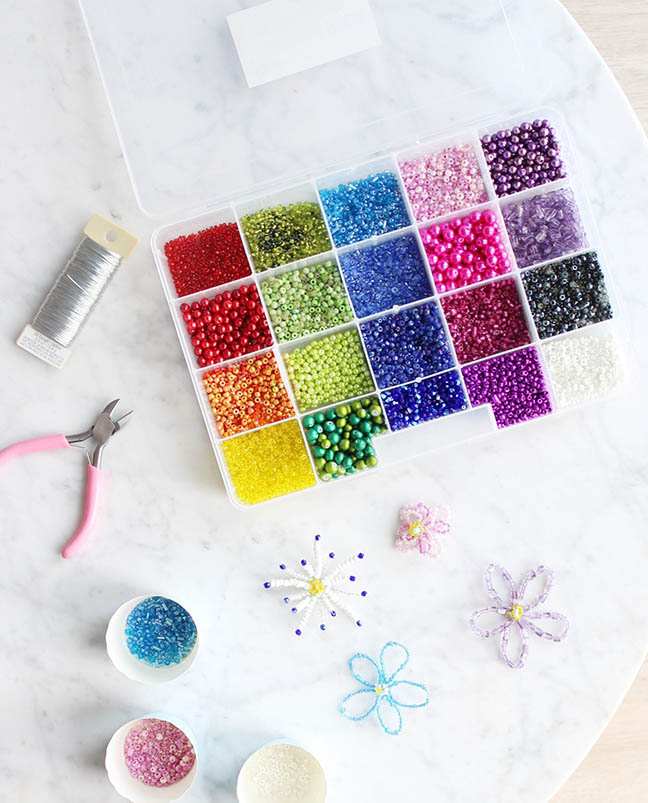
Beads are great for making jewelry but can also be used to create beaded flowers, just in time for spring! This crafting activity is the perfect project to engage the whole family.
There are countless options for beaded flowers, and making very ornate beaded flowers with just a few items is possible. However, for this project, we decided to focus on two of the most accessible beaded flower patterns so that those just starting with beading and kids could join the fun.
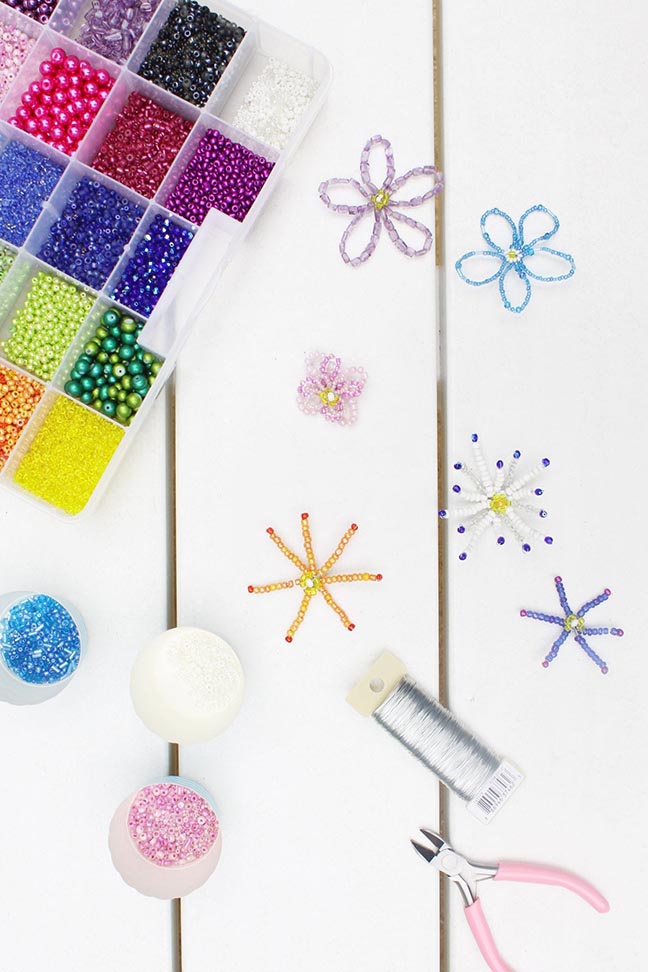
The steps below detail how to make the rounded and straight petal flowers shown in the images. We recommend starting with a single layer of petals. Once you get the hang of it, it’s easy to add on with more petals.
If you need help picking out supplies, our beading kits are perfect for this project!
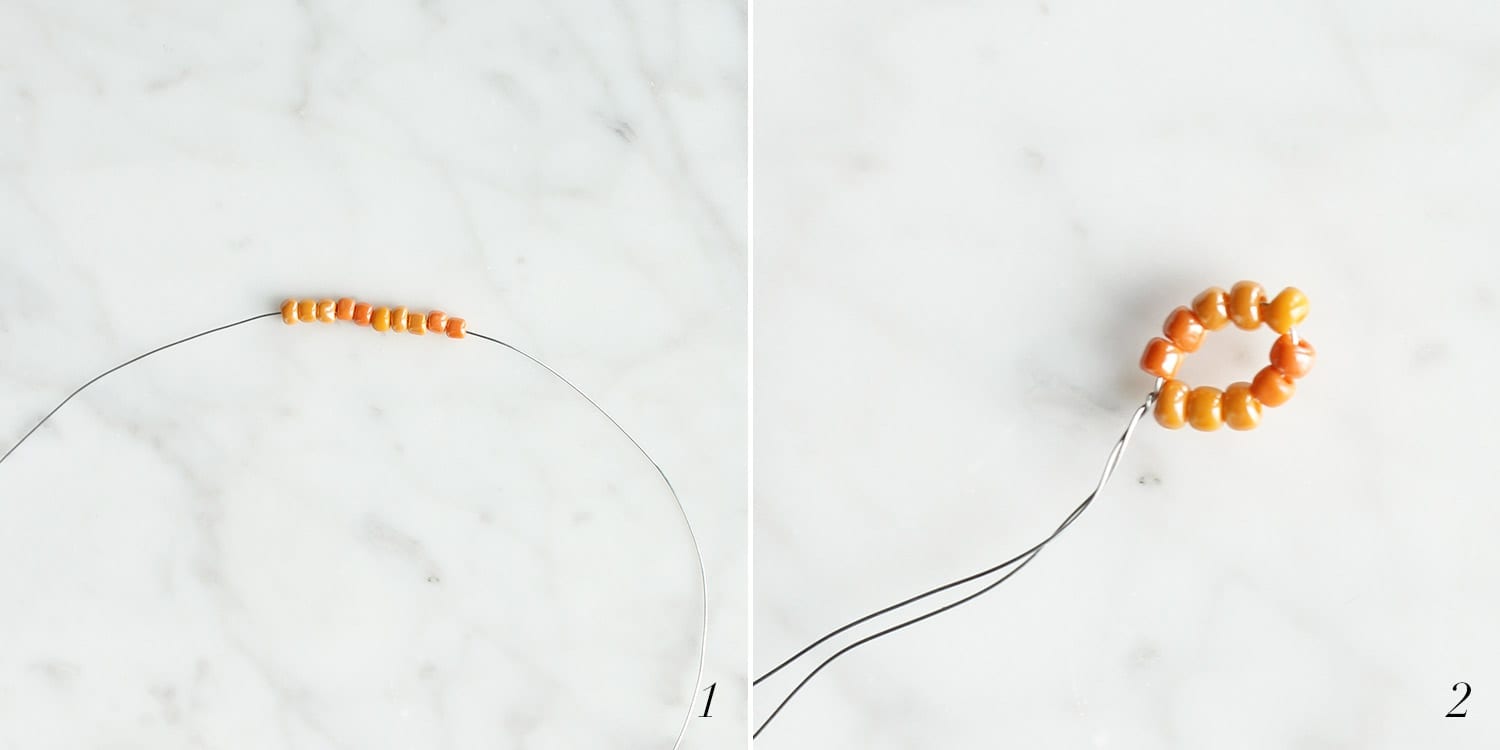
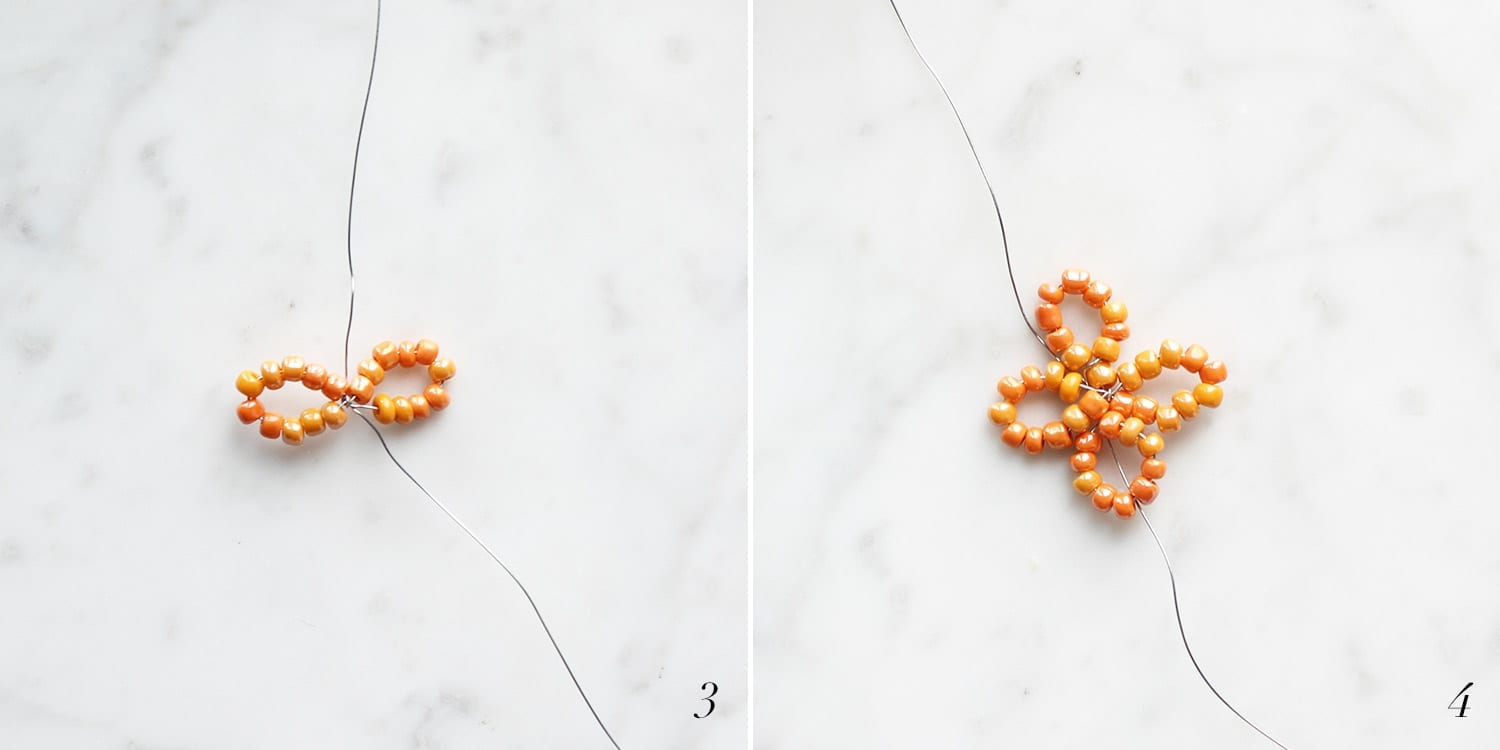
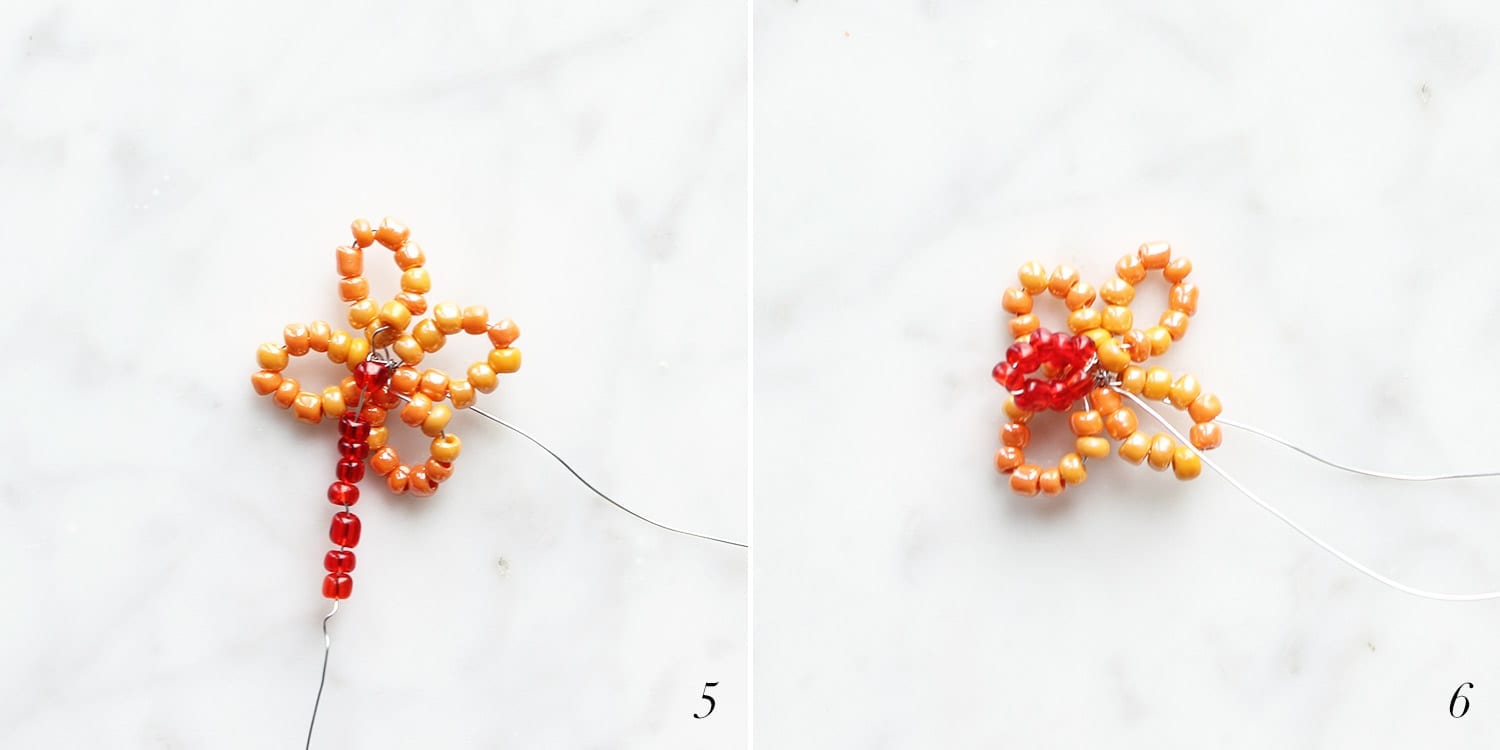
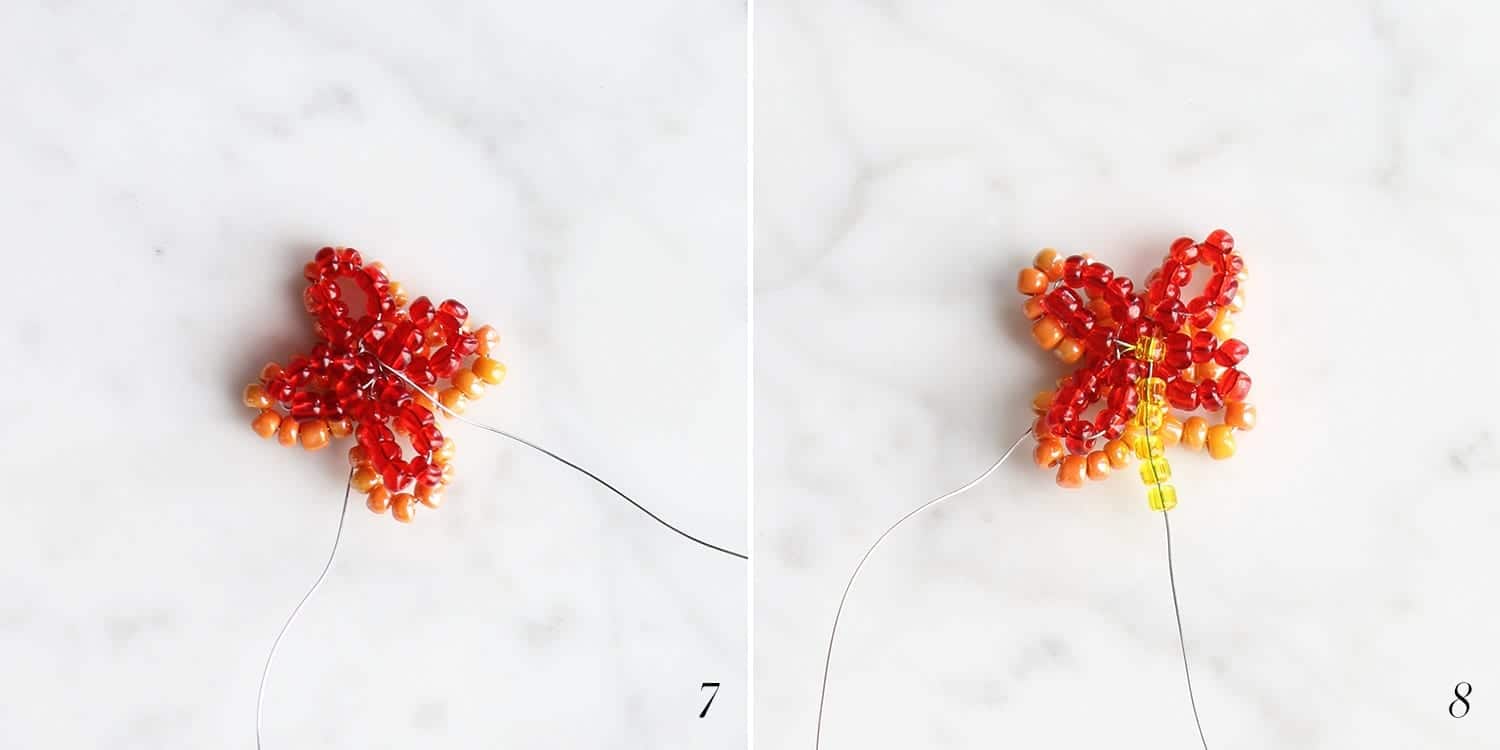
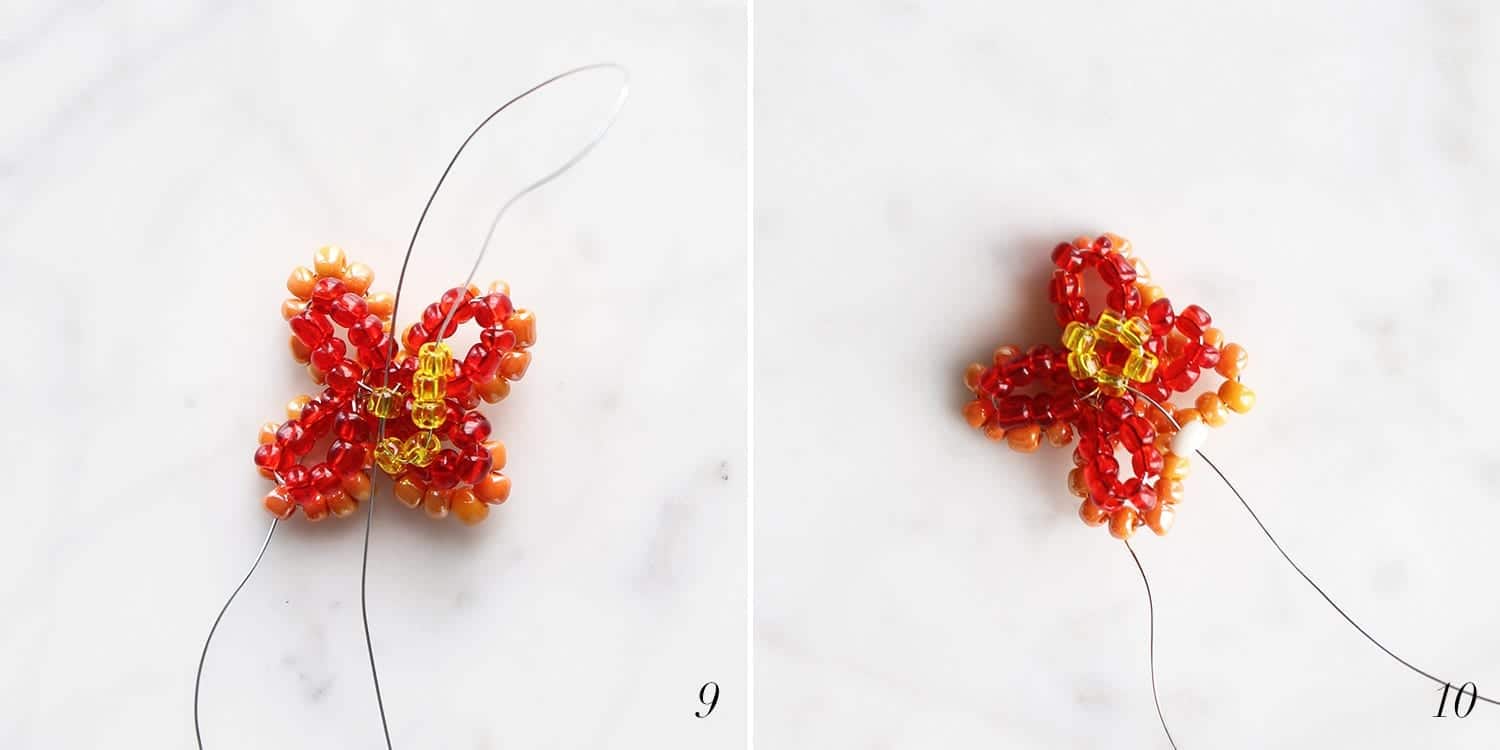
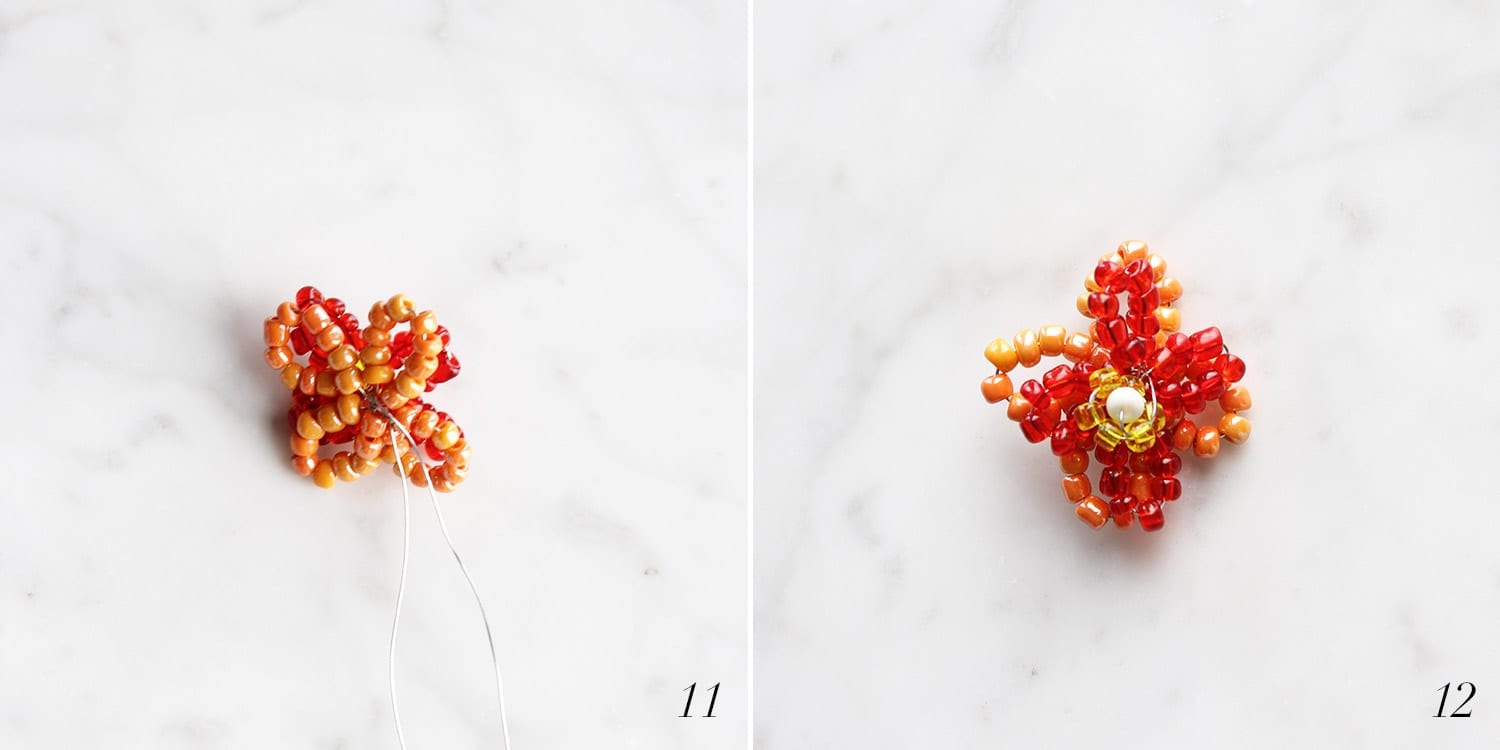
The numbers on the images correspond to the steps below.
1. Use the flush cutter pliers to cut a 32-inch piece of wire. (You’ll need a 60-inch or longer wire if you plan to do multiple layers of petals.) String the beads you’ll use for your first petal on the center of the wire.
2. Twist the wire to form a loop. Secure the beads by twisting the wire at the end of the loop a few times.
3. String an equal number of beads as your first petal on the wire. Form your second loop and secure the ends by twisting the wire at the end of the loop.
4. Continue this process until you have all the petals for your flower.
5. You can jump to step eight if you’re ready to create the center of your flower. If you’d like to add another layer of petals, choose a different color bead and string a smaller number of beads than your first petals. For the flowers shown in the images, we used 10 beads for each orange petal and eight beads for each red petal.
6. Form a loop and twist the end of the wire a few times to secure it.
7. Continue this process until you have completed your second layer of petals.
8. Choose a bead color for the outer circle of the center of the flower and a bead that will go directly in the center. String the beads that will be used as the outer circle. You’ll want to use enough beads to surround the center bead.
9. Form a circle, string the wire back through the last bead, and pull tightly.
10. You should now have the outer circle. String the center bead on the wire and pull it across to the opposite side. String the end of the wire through one of the outer circle beads to secure it.
11. Pull both wires through to the back of the flower and twist them together a few times to secure them.
12. You now have a completed flower!
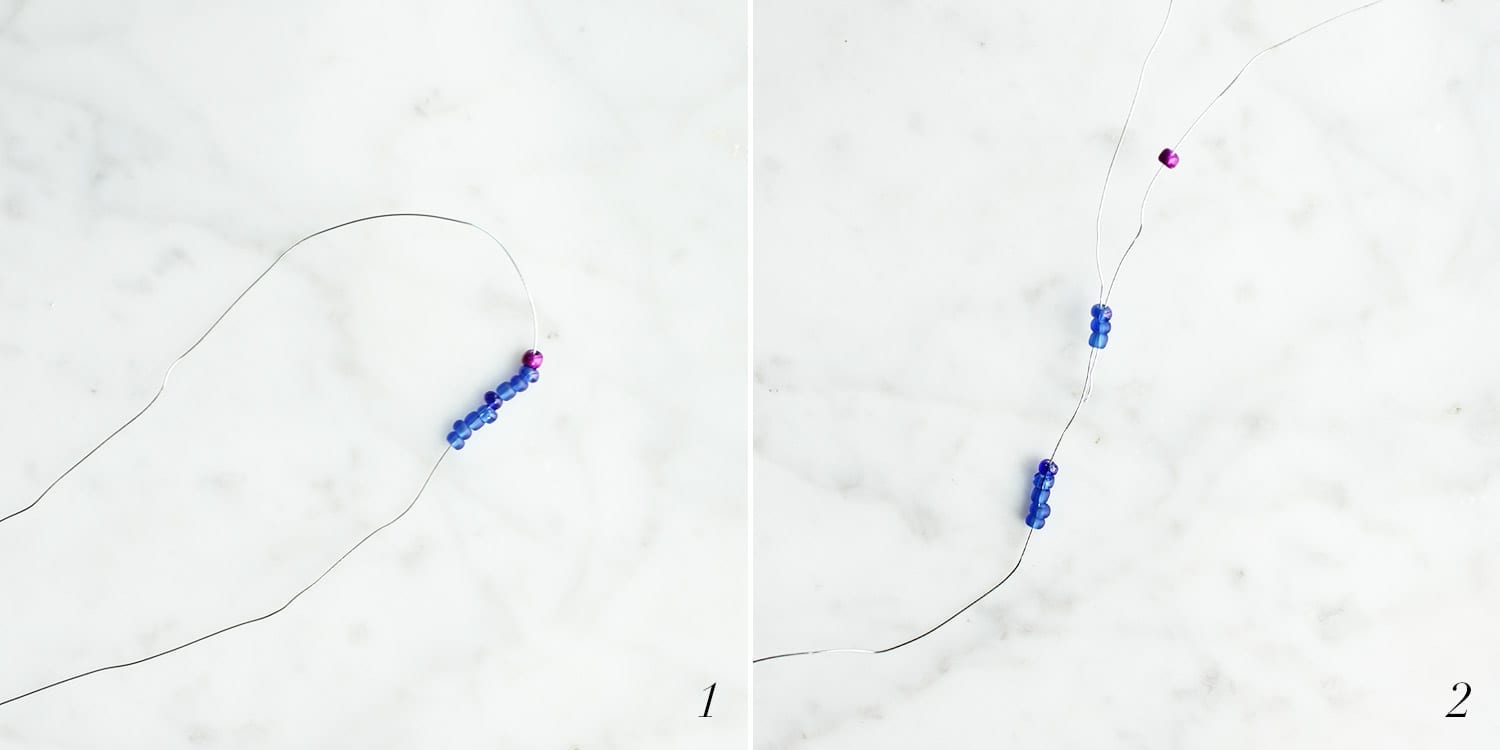
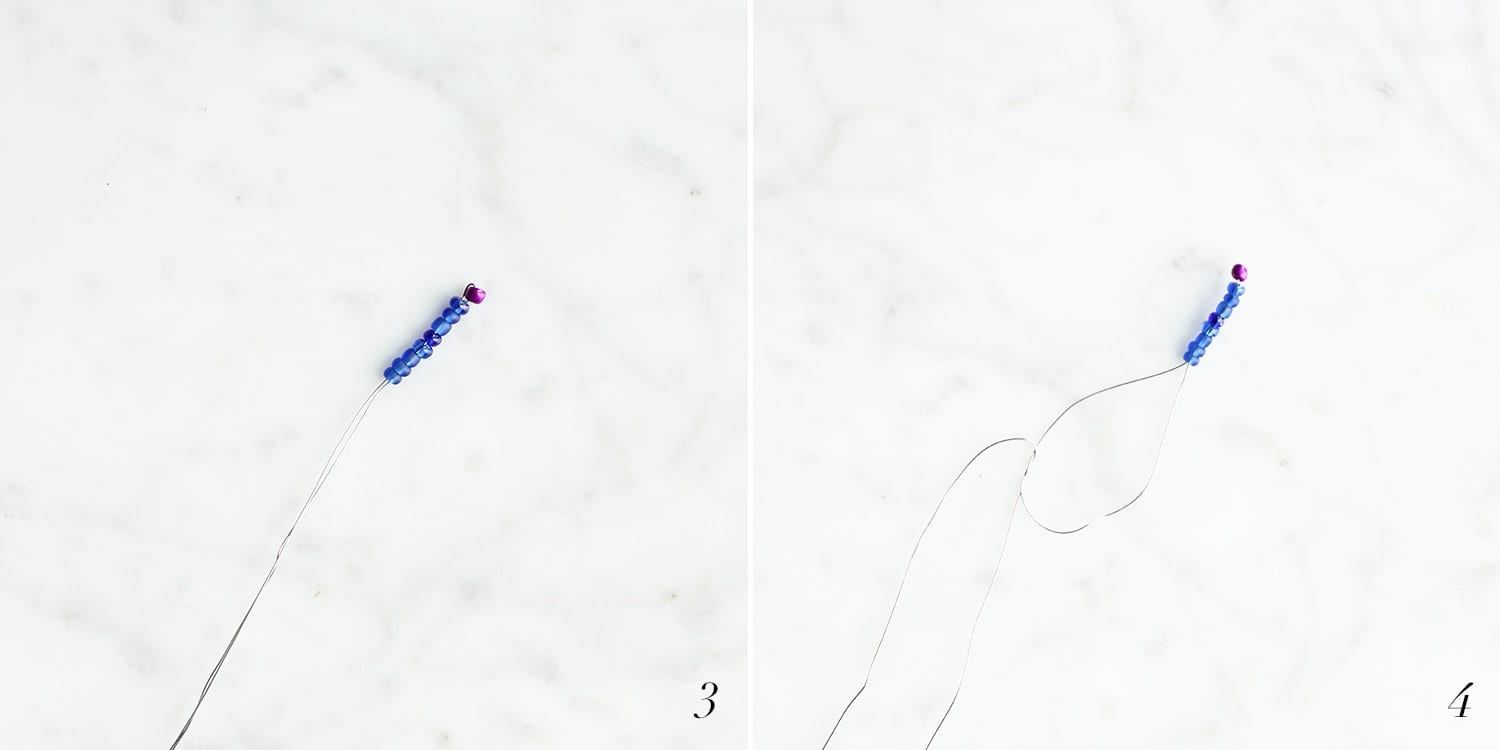
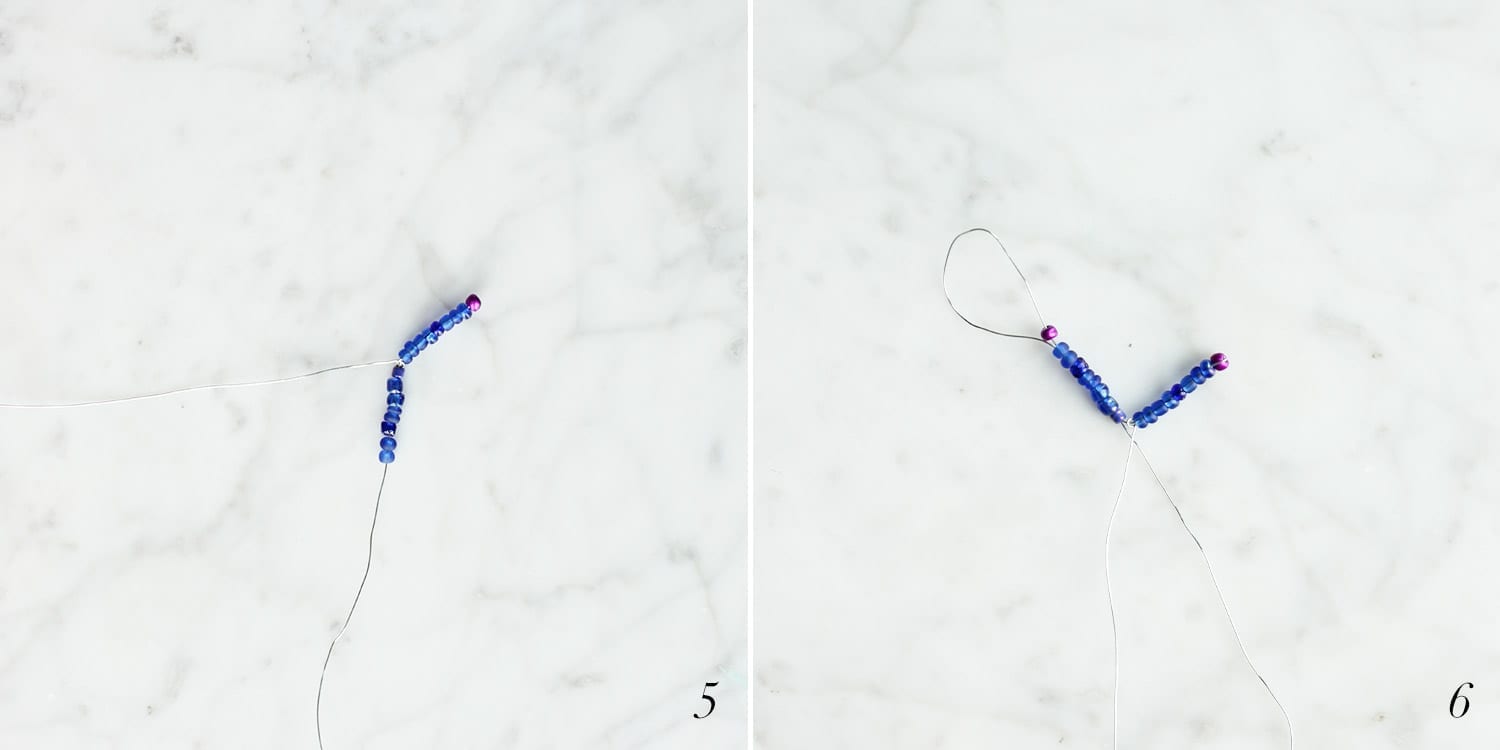
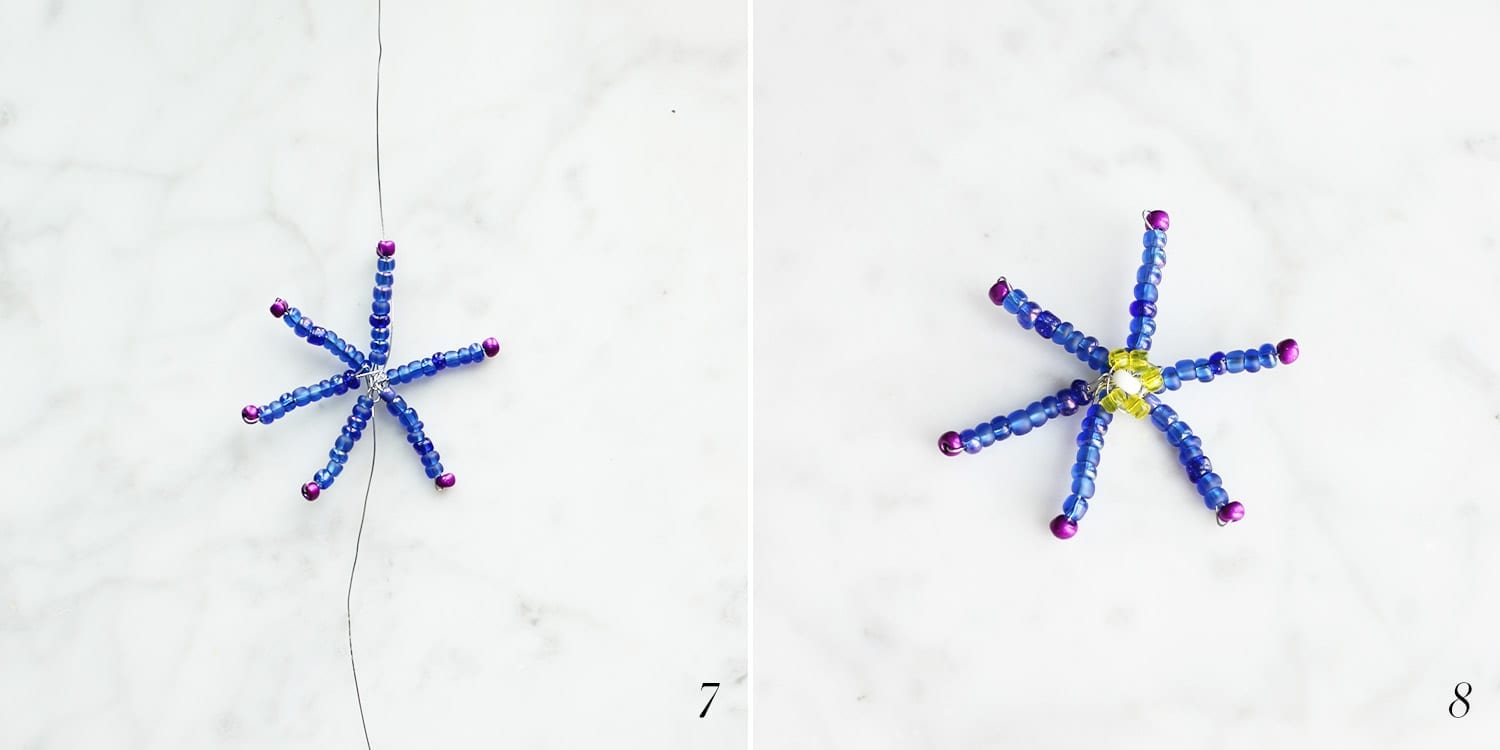
The numbers on the images correspond to the steps below.
1. Use the flush cutter pliers to cut a 32-inch piece of wire. (You’ll need a 60-inch or longer wire if you plan to do multiple layers of petals.) You’ll be stringing each bead through the wire twice, so choosing beads with large enough holes for this project is essential. String the beads you’ll use for your first petal on the center of the wire. We like to use a different color bead for the tip of the petal.
2. Leaving the tip of the petal at the top of the loop, string all the remaining beads back through the wire.
3. Pull the wire tightly so that the beads form a straight petal.
4. Create a loop with the ends of the wire and pull tightly to secure the end of the petal.
5. Create your second petal, starting with the bottom, followed by the tip of the petal.
6. Leave the tip of the petal at the top of the loop and string all the remaining beads back through the wire.
7. Continue this process until you have all the petals for your flower.
8. Create a second layer of petals or jump to step eight above to create the center of your flower.
Need some Happy Mail? Join our mailing list to stay updated on the latest Dragonfly Designs news, latest offerings, and special promotions!
© 2025 Dragonfly Designs. All Rights Reserved | Proud to be a Woman-Owned Small Business

Join our mailing list today and also receive a FREE, beautifully illustrated coloring e-book. Time to unlease your creativity!